Building Your Free Blog from Scratch (GitHub + Cloudflare)
A static site deployment guide based on GitHub and Cloudflare (Hugo)
Preface
As a long-time VPS server holder, I initially tried using Alibaba Cloud’s VPS as a platform for my Hugo Blog site. Throughout the deployment process and based on the final results, I identified the following issues:
- Performance limited by VPS hardware configuration;
- HTTPS requires manual certificate configuration on the web server;
- Content publishing is cumbersome and complex; backend data updates are not timely and rely on scripts;
- Low website reliability;
- Conflicts with other services deployed on the same VPS.
Ultimately, I chose the GitHub Pages + Cloudflare hosting solution for my blog. It solves all the above problems — and most importantly, it’s free!
GitHub + Cloudflare
Register & Configure GitHub Repository
Repository name: example.com (Customize your blog website repository name)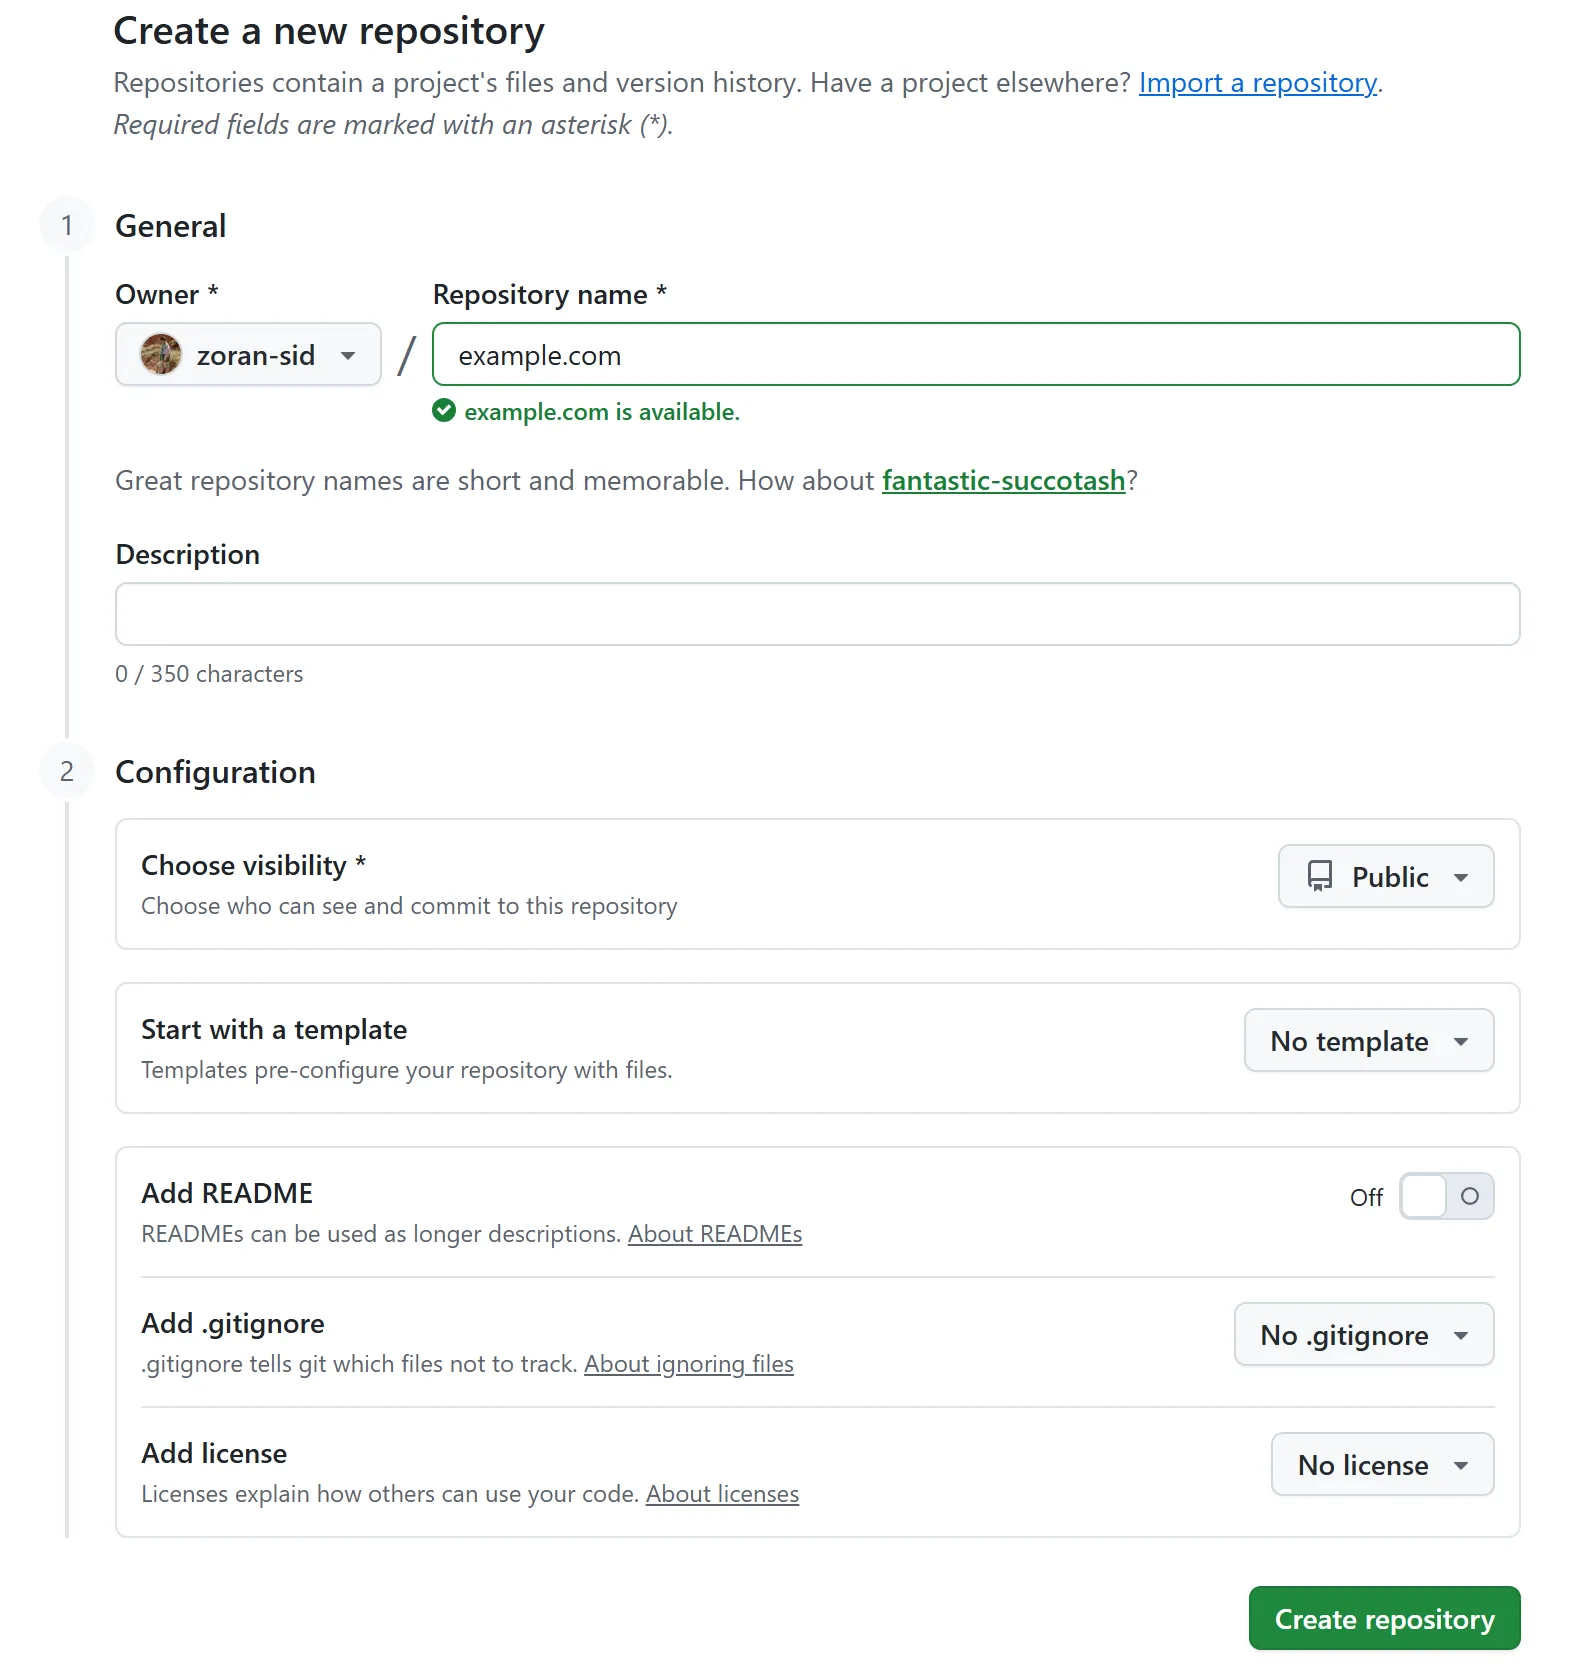
Install Git
Install Git
For convenient local management of your GitHub repository.
Official website: https://git-scm.com/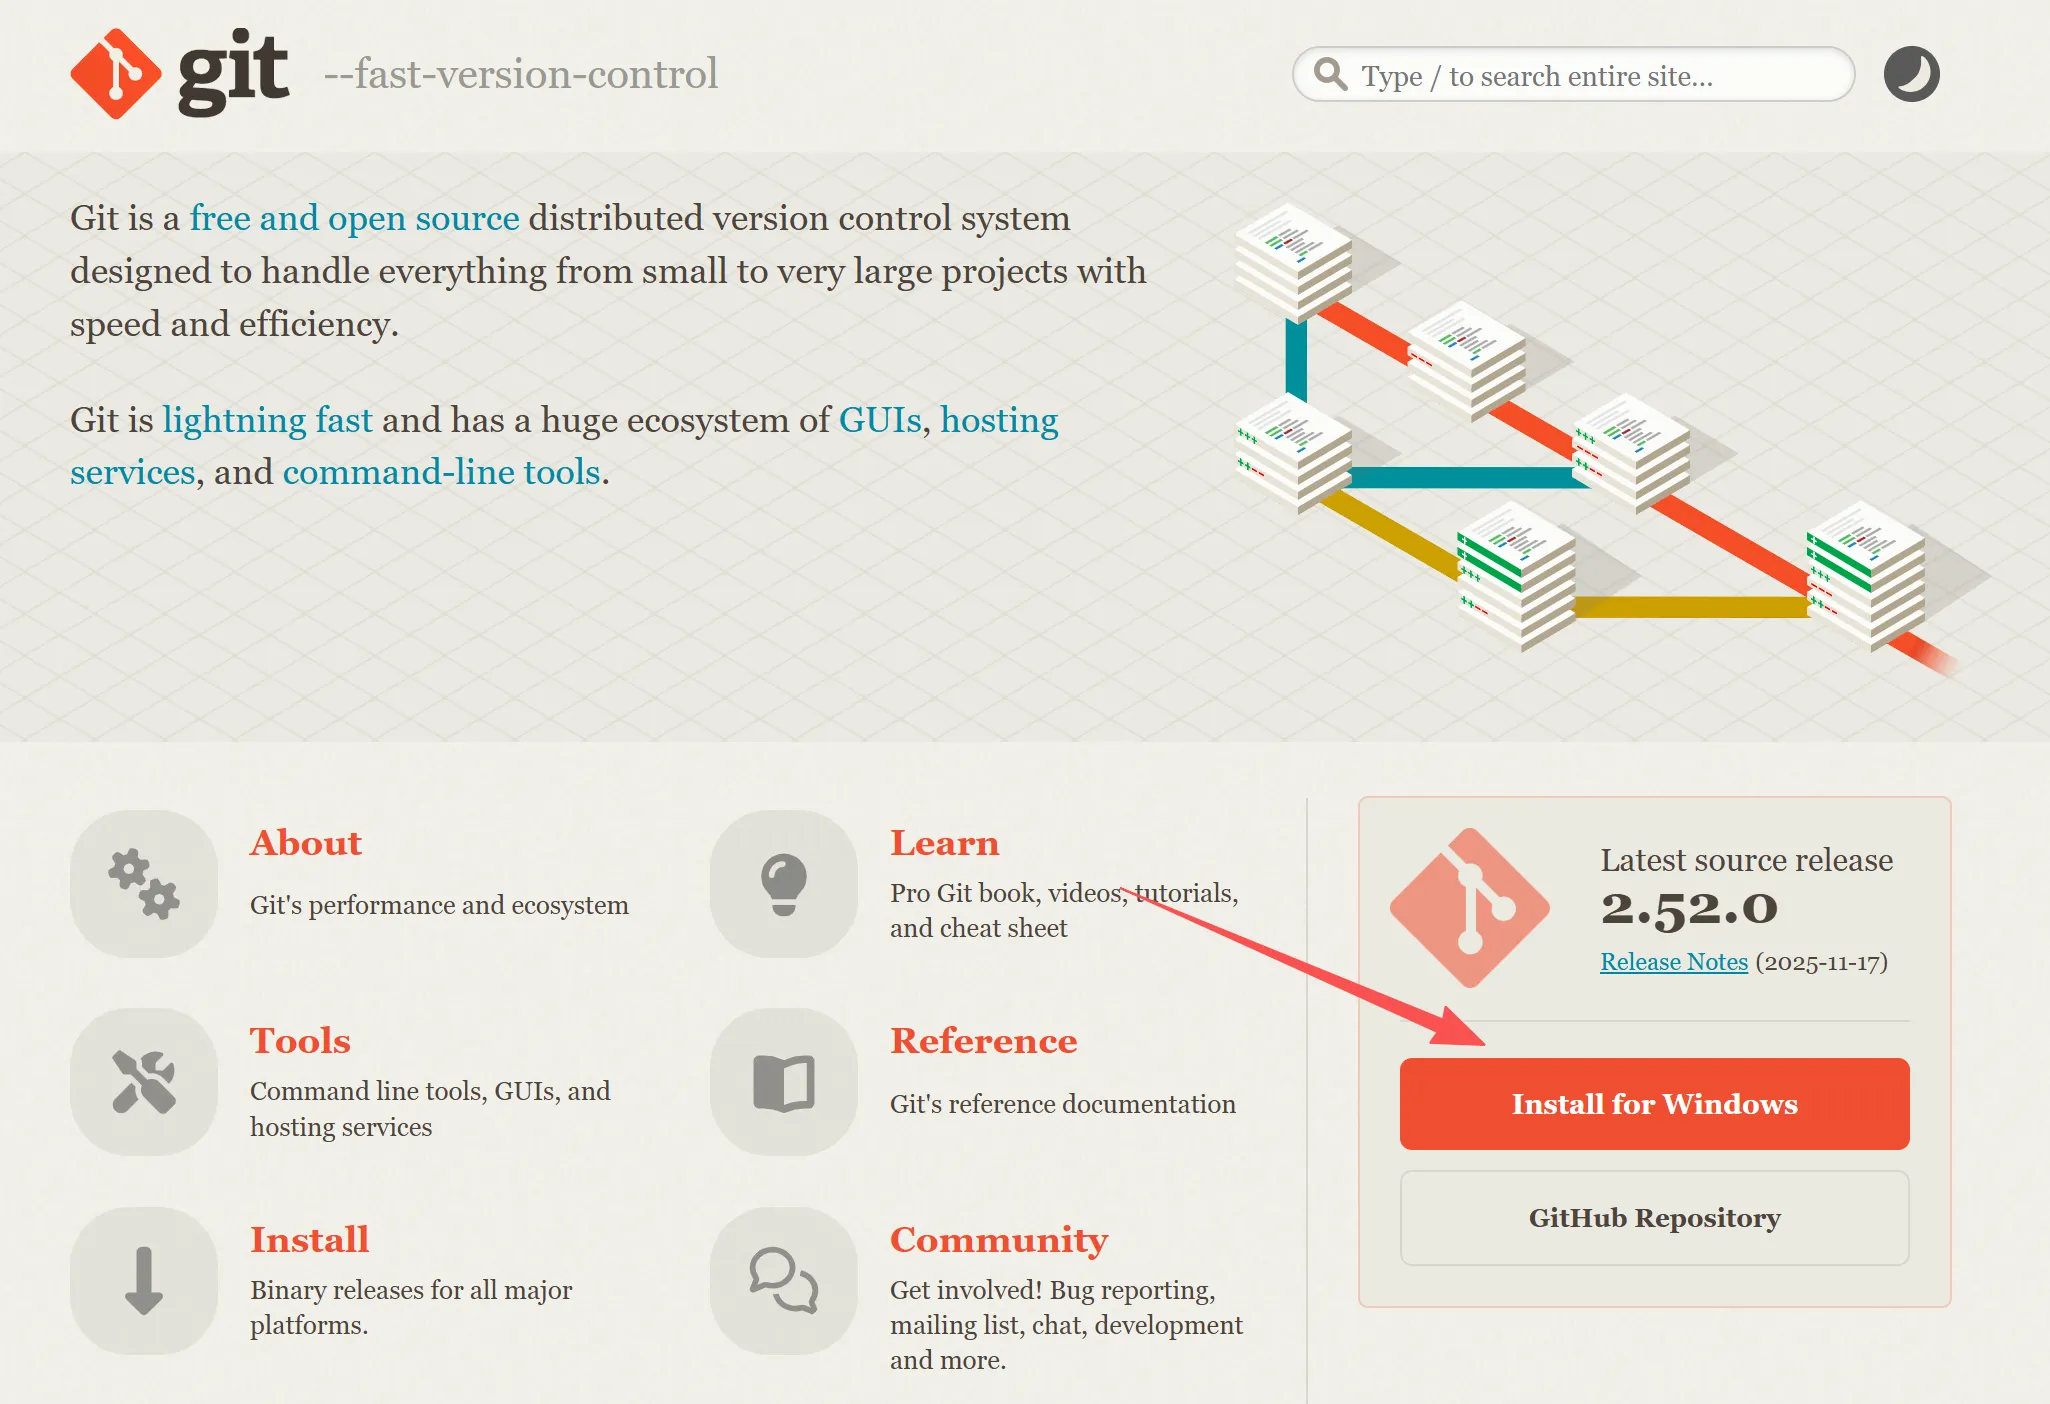
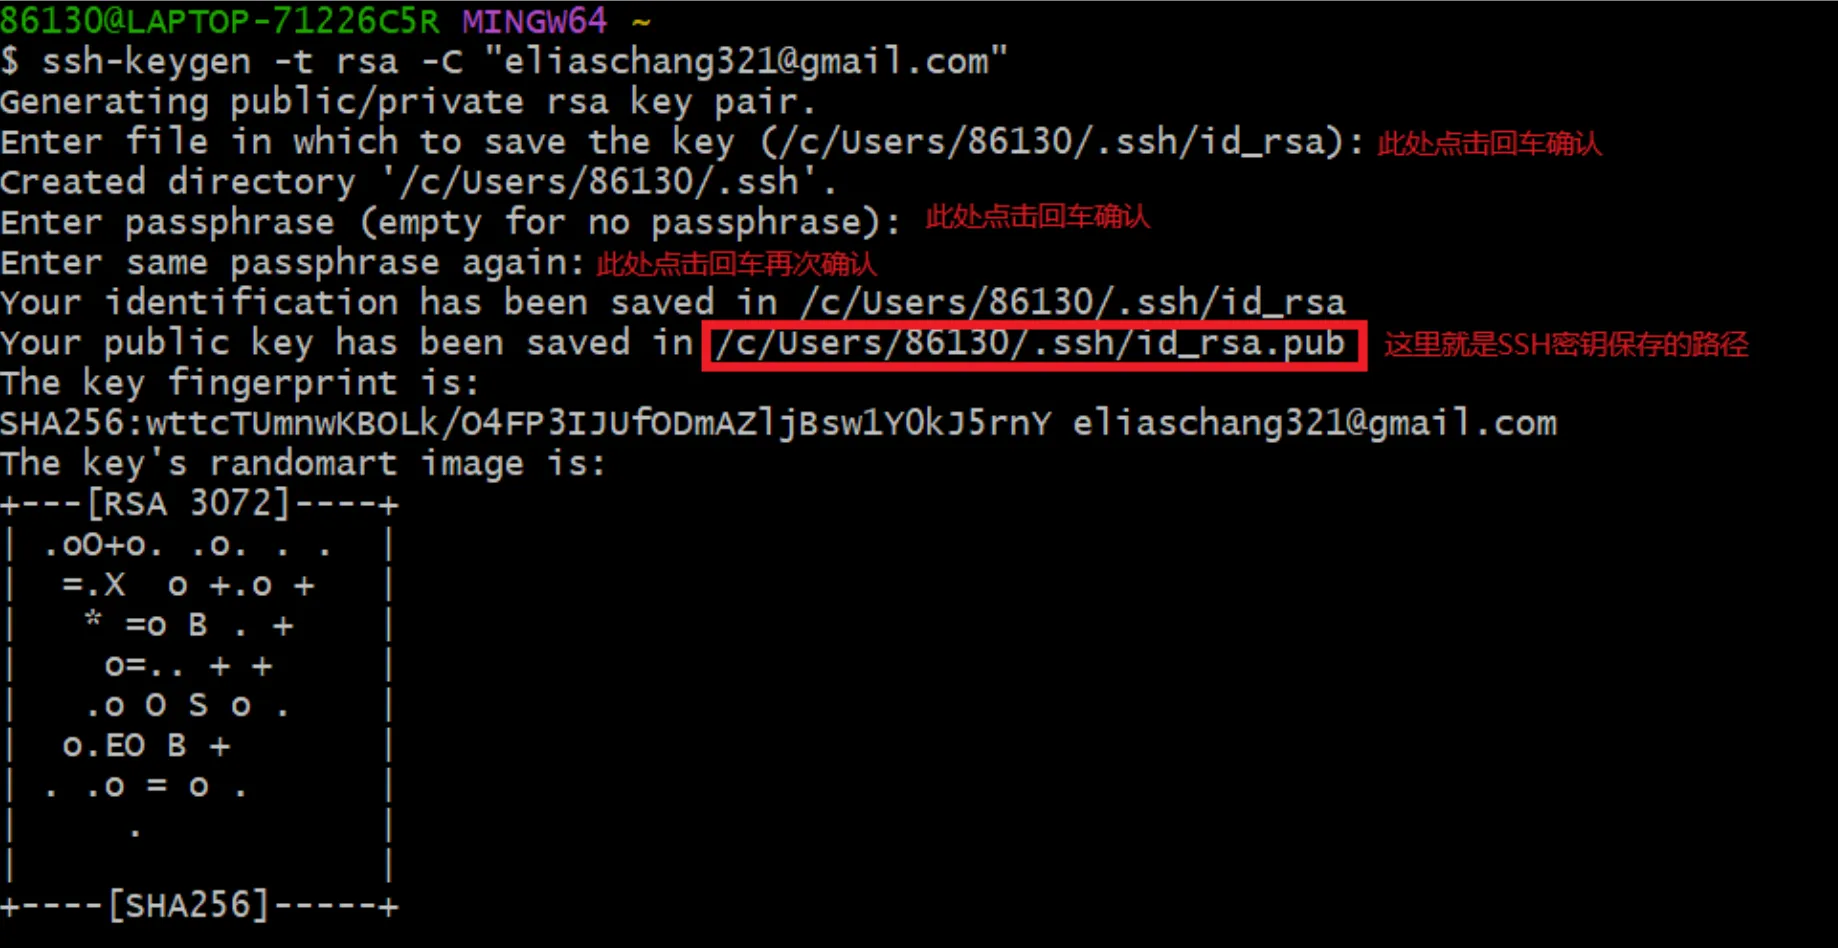
Local SSH Key
Use cmd on Windows to generate a local SSH key.
Set SSH Keys
In GitHub settings under SSH and GPG keys, add the generated SSH key.
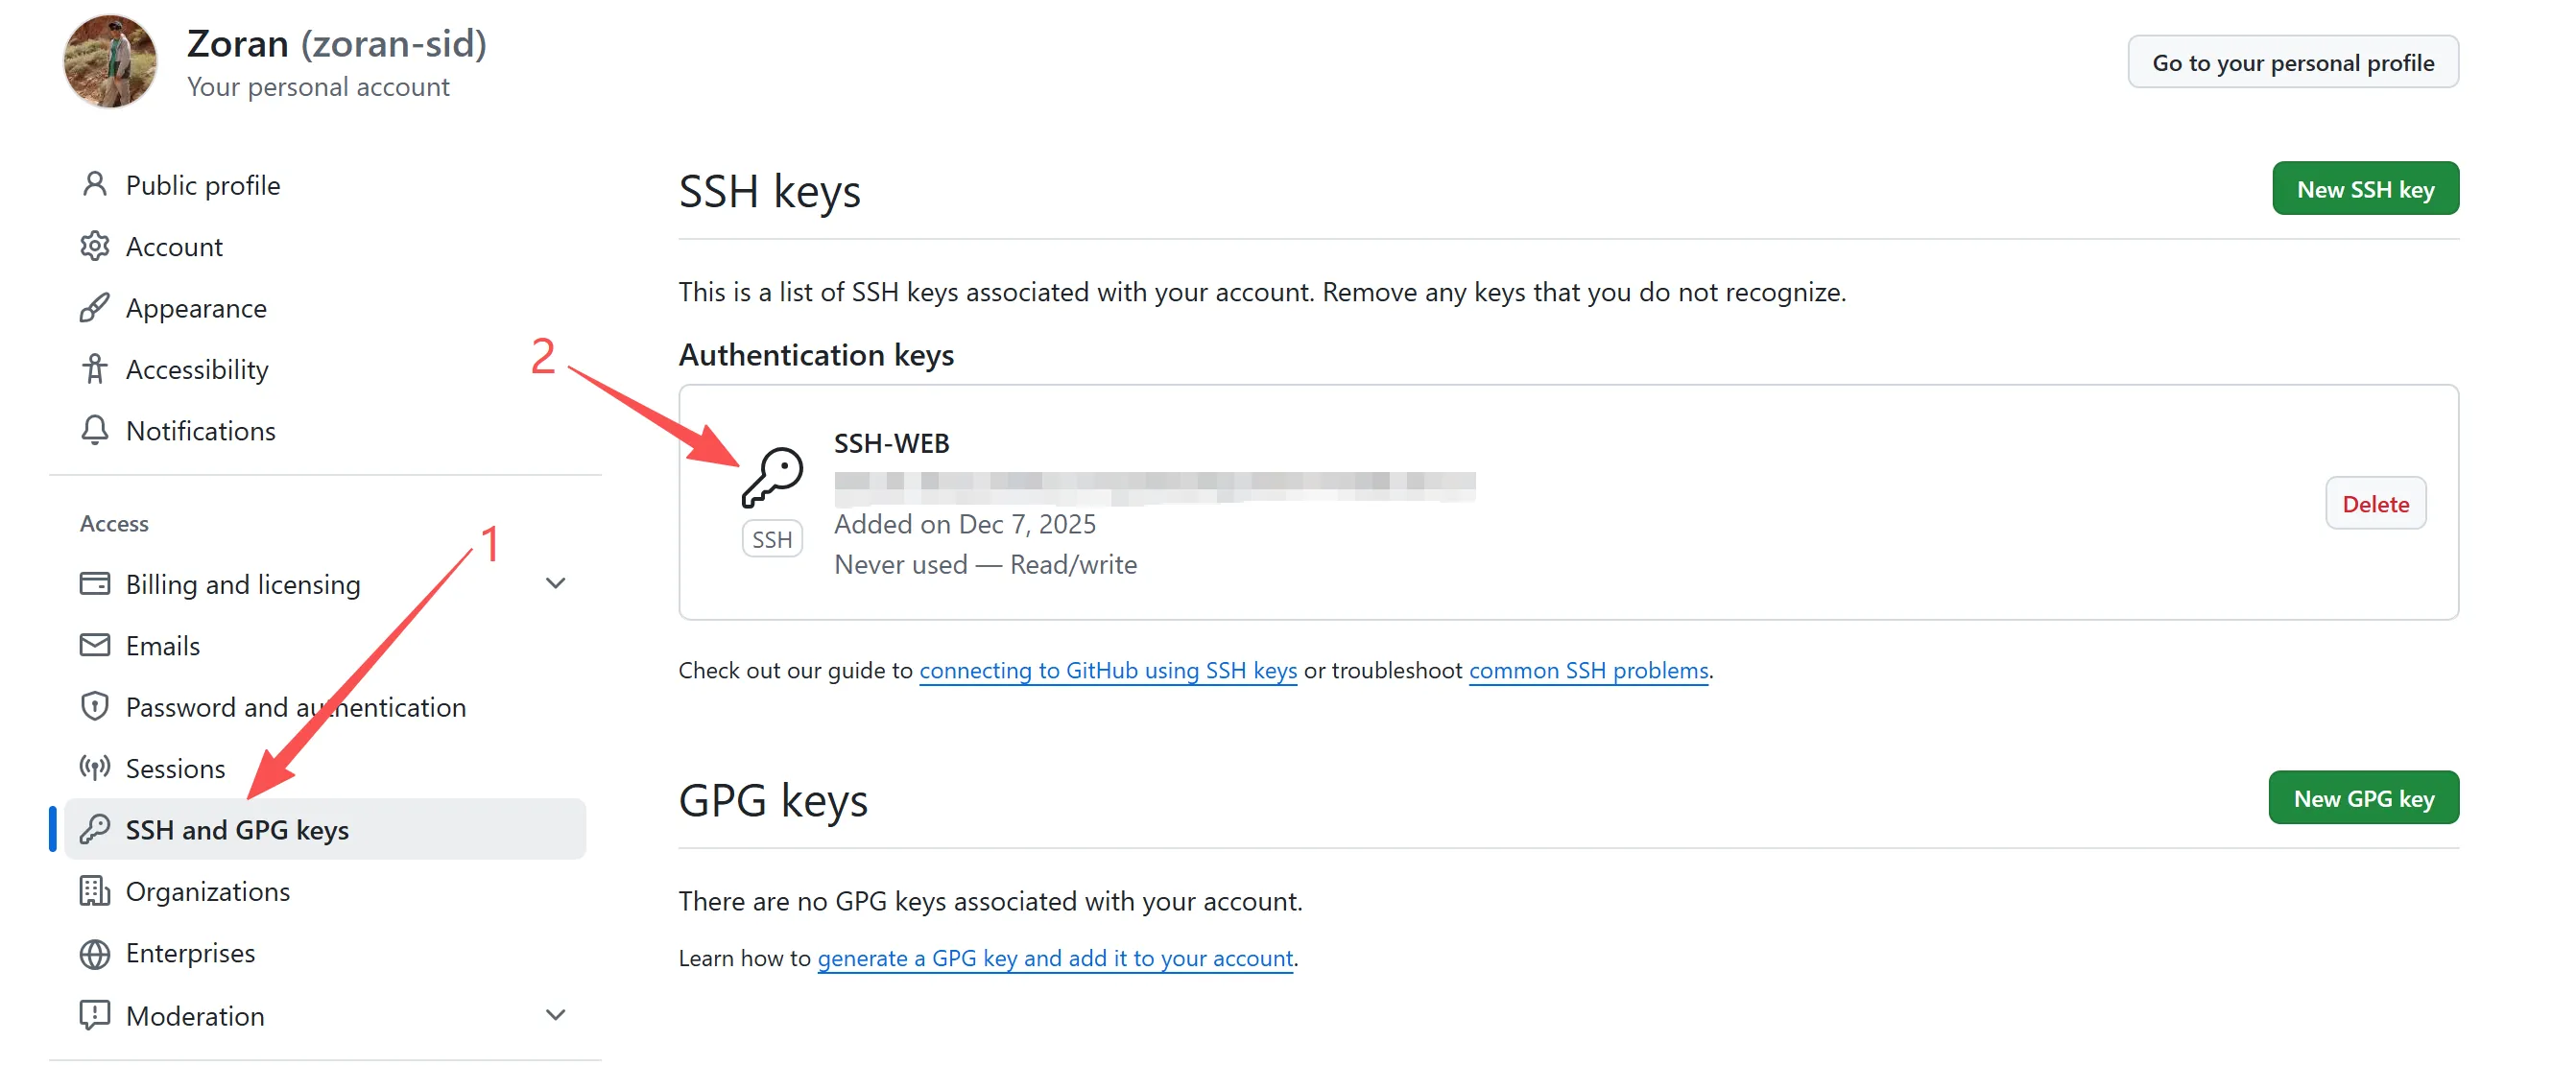
After this, you can upload files to the repository via Git commands over HTTPS~
Hugo Theme
Choose a suitable theme from Hugo themes as your blog template.
https://themes.gohugo.io/The theme used for this website:
https://github.com/reorx/hugo-PaperModXGit Clone the Repository
git clone https://github.com/reorx/hugo-PaperModX.gitFile Structure
- content: Stores posts, etc.
- data: Social media configurations
- layouts: The overall static website layout (important!)
- assets: Stores CSS, JS files; default toml pulls avatar
- i18n: Multi-language
- I chose to overlay ExampleSite with the repository root directory. Different themes will have different configuration approaches. This tutorial is not adapted for all themes.
Push Files to GitHub
- git init: Generate a .git hidden file in this folder;
- git add .: Add files to the staging area (note the ”.” with a space — ”.” means submitting all contents of this folder. You can also use
git add filenameto submit specific files); - git status: Check the current status — can skip if you prefer;
- git commit -m “your comment here”: Commit the files added to the staging area;
- git remote add origin remote_url: Associate the GitHub repository with your local repository;
- git push origin main: Push files to the repository.
Note:
- Step 4 may require configuring personal info, otherwise you can’t push files. Follow CLI prompts.
- Ensure the pushed repository’s main branch matches the CLI setting.
Configure toml File
title = "ZORAN"  // Blog title
baseURL = "https://zoranzhou.com/"  // Main website URL
languageCode = "en-us"
defaultContentLanguage = "en"
enableEmoji = true
ignoreErrors = ["additional-script-loading-error"]
disqusShortname = ""

[pagination]  // Number of posts displayed on homepage
pagerSize = 10

##############################
# Params
##############################
[params]
TocSide = "left"   // Left aligned
EnableInstantClick = false  // Set to false because of the Waline integration, ensures HTML refreshes correctly

# --- Logo ---
[params.logo]
icon = "favicon.png" // Stored in assets/favicon.png
iconWidth = 128
iconHeight = 128
text = ""

##############################
# Menu - Ensure all navigation pages display correctly
##############################
[menu]

  [[menu.main]]
  name = "Home"
  url = "/"
  weight = 1

  [[menu.main]]
  name = "Blog"
  url = "/posts/"
  weight = 2

  [[menu.main]]
  name = "Archives"
  url = "/archives/"
  weight = 3
    [menu.main.params]
    external = false

# --- Social Icons --- Social media configuration
[[params.social]]
name = "github"
url = "xxx"

[[params.social]]
name = "twitter"
url = "xxx"

##############################
# Comments - Comment system configuration (optional)
##############################
[params.commentSystems.waline]
serverURL = "xxx"  # Comment system backend URL
locale = "en"

[params.defaultCommentSystems]
waline = true
Other Common Attributes
Theme Switch Toggle
Shows icon beside title of page to change theme.
To disable it:
disableThemeToggle: trueYou can refer to the following table for better understanding…
defaultTheme | disableThemeToggle | checks local storage? | checks system theme? | Info |
|---|---|---|---|---|
auto | true | No | Yes | only system theme |
| false | Yes (if not->2) | Yes (2) | switch present | |
dark | true | No | No | force dark only |
| false | Yes | No | switch present | |
light | true | No | No | force light only |
| false | Yes | No | switch present |
Archives Layout
Create a page with archive.md in content directory with following content:
.
├── config.toml
├── content/
│   ├── archives.md   <--- Create archive.md here
│   └── posts/
 ── static/
and add the following to it:
---
title: "Archive"
layout: "archives"
url: "/archives/"
summary: archives
---Note: Archives layout does not support multi-language month translation.
Search Page
PaperModX uses Fuse.js Basic for search functionality.
Add the following to site config, config.yml:
[outputs]
  home = ["HTML", "JSON","RSS"]
Create a page with search.md in content directory with following content:
---
title: "Search" # in any language you want
layout: "search" # is necessary
# url: "/archive"
# description: "Description for Search"
summary: "search"
---
To hide a particular page from being searched, add it in post’s front matter:
searchHidden: trueShare Buttons on Post
Displays Share Buttons at bottom of each post.
To show share buttons add:
params:
    ShowShareButtons: true
Show Post Reading Time
Displays Reading Time (the estimated time, in minutes, it takes to read the content.)
To show reading time add:
Params:
    ShowReadingTime: true
Show Table of Contents (Toc) on Blog Post
Displays ToC on blog pages.
To show ToC add following to page variables:
ShowToc: trueTo keep Toc Open by default on a post add following to page variables:
TocOpen: trueBreadCrumb Navigation
Adds BreadCrumb Navigation above Post’s Title to show subsections and Navigation to Home.
params:
    ShowBreadCrumbs: true
Can be disabled for particular page’s front matter:
---
ShowBreadCrumbs: false
---
Cloudflare Configuration
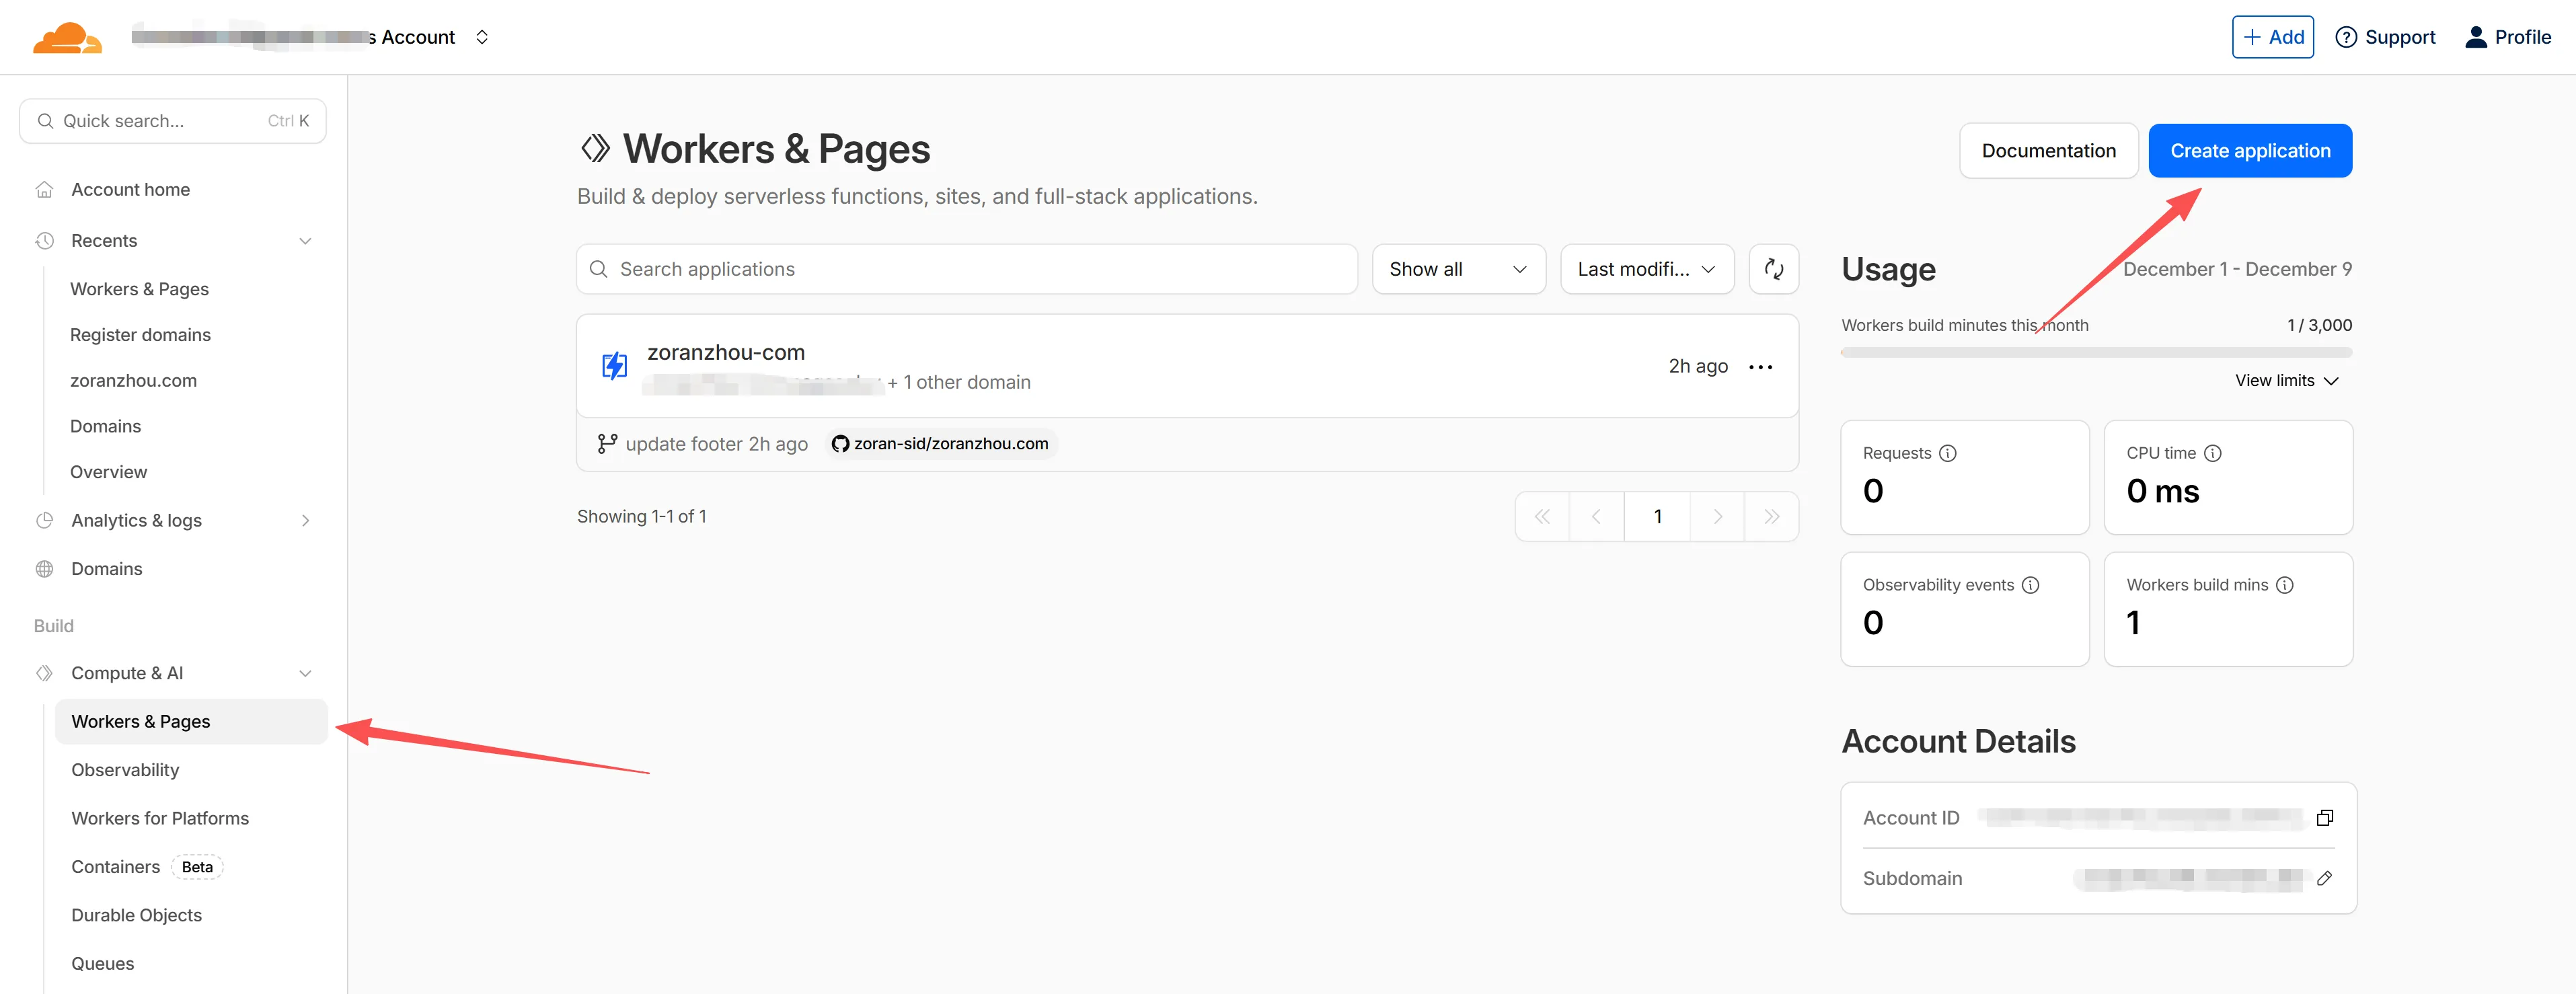
Workers & Pages
Configure Workers & Pages.
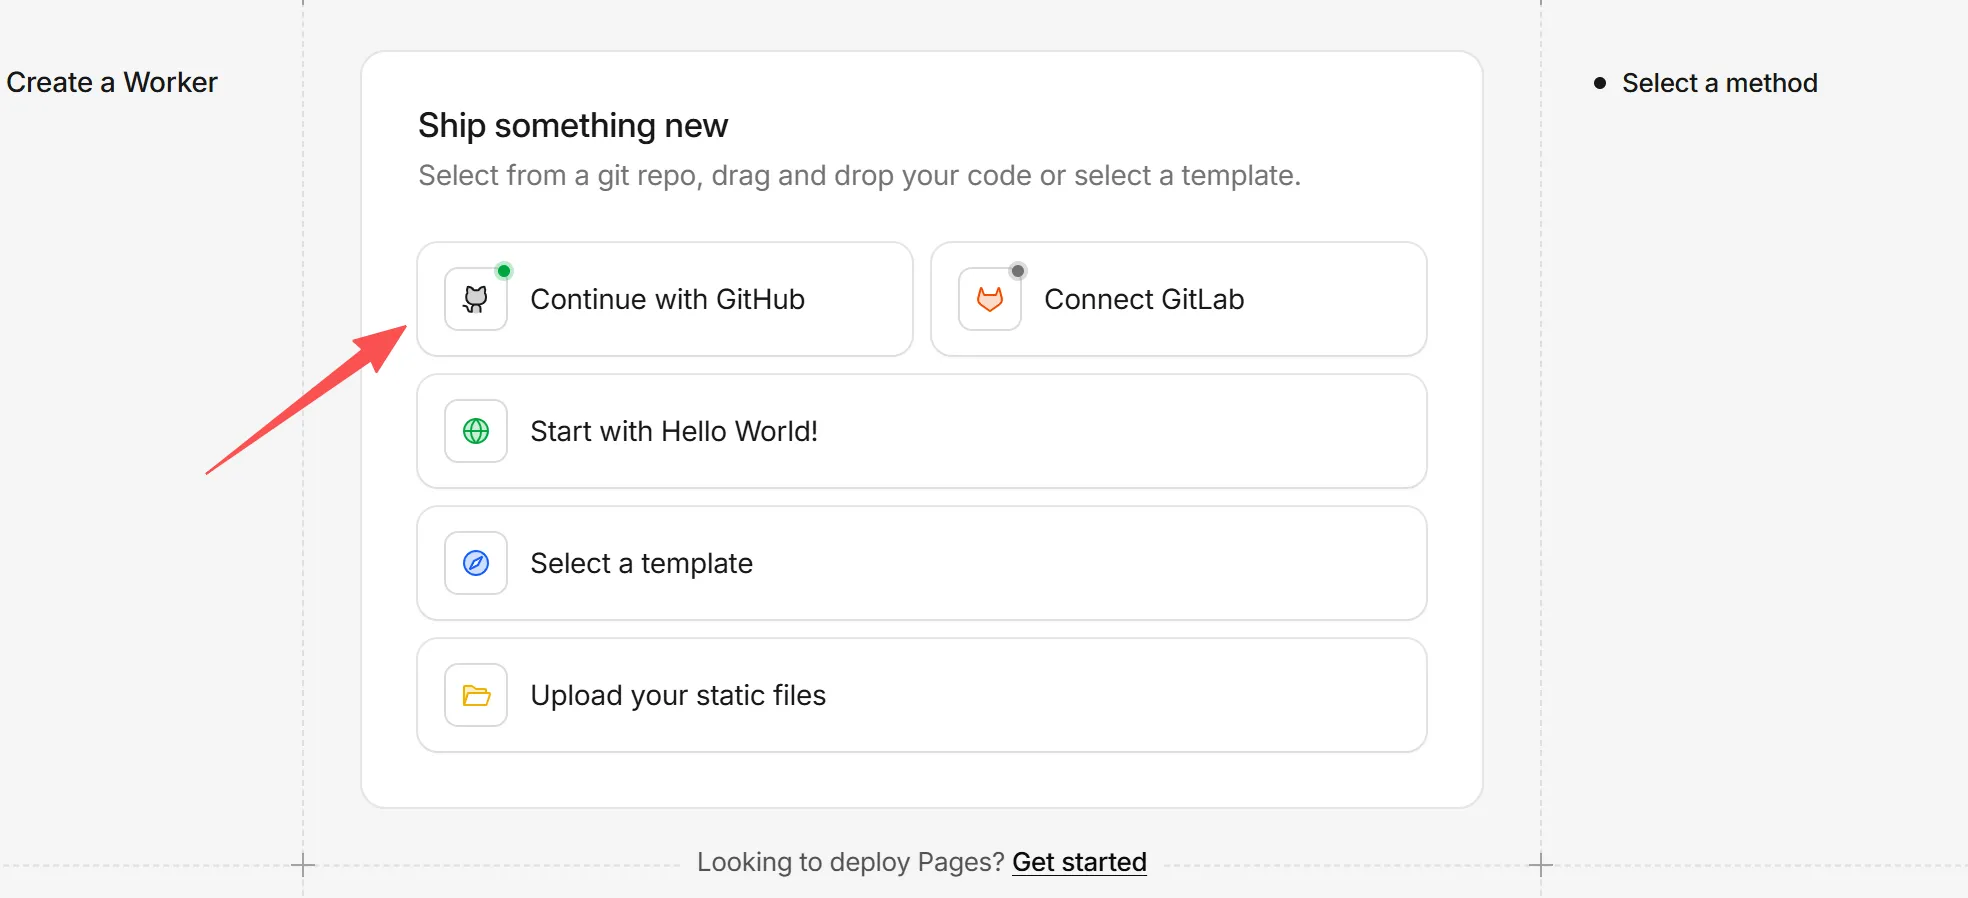
Link GitHub repository.
Select the repository you just created:
Project name: any
Production branch: select the correct branch
Framework preset: select Hugo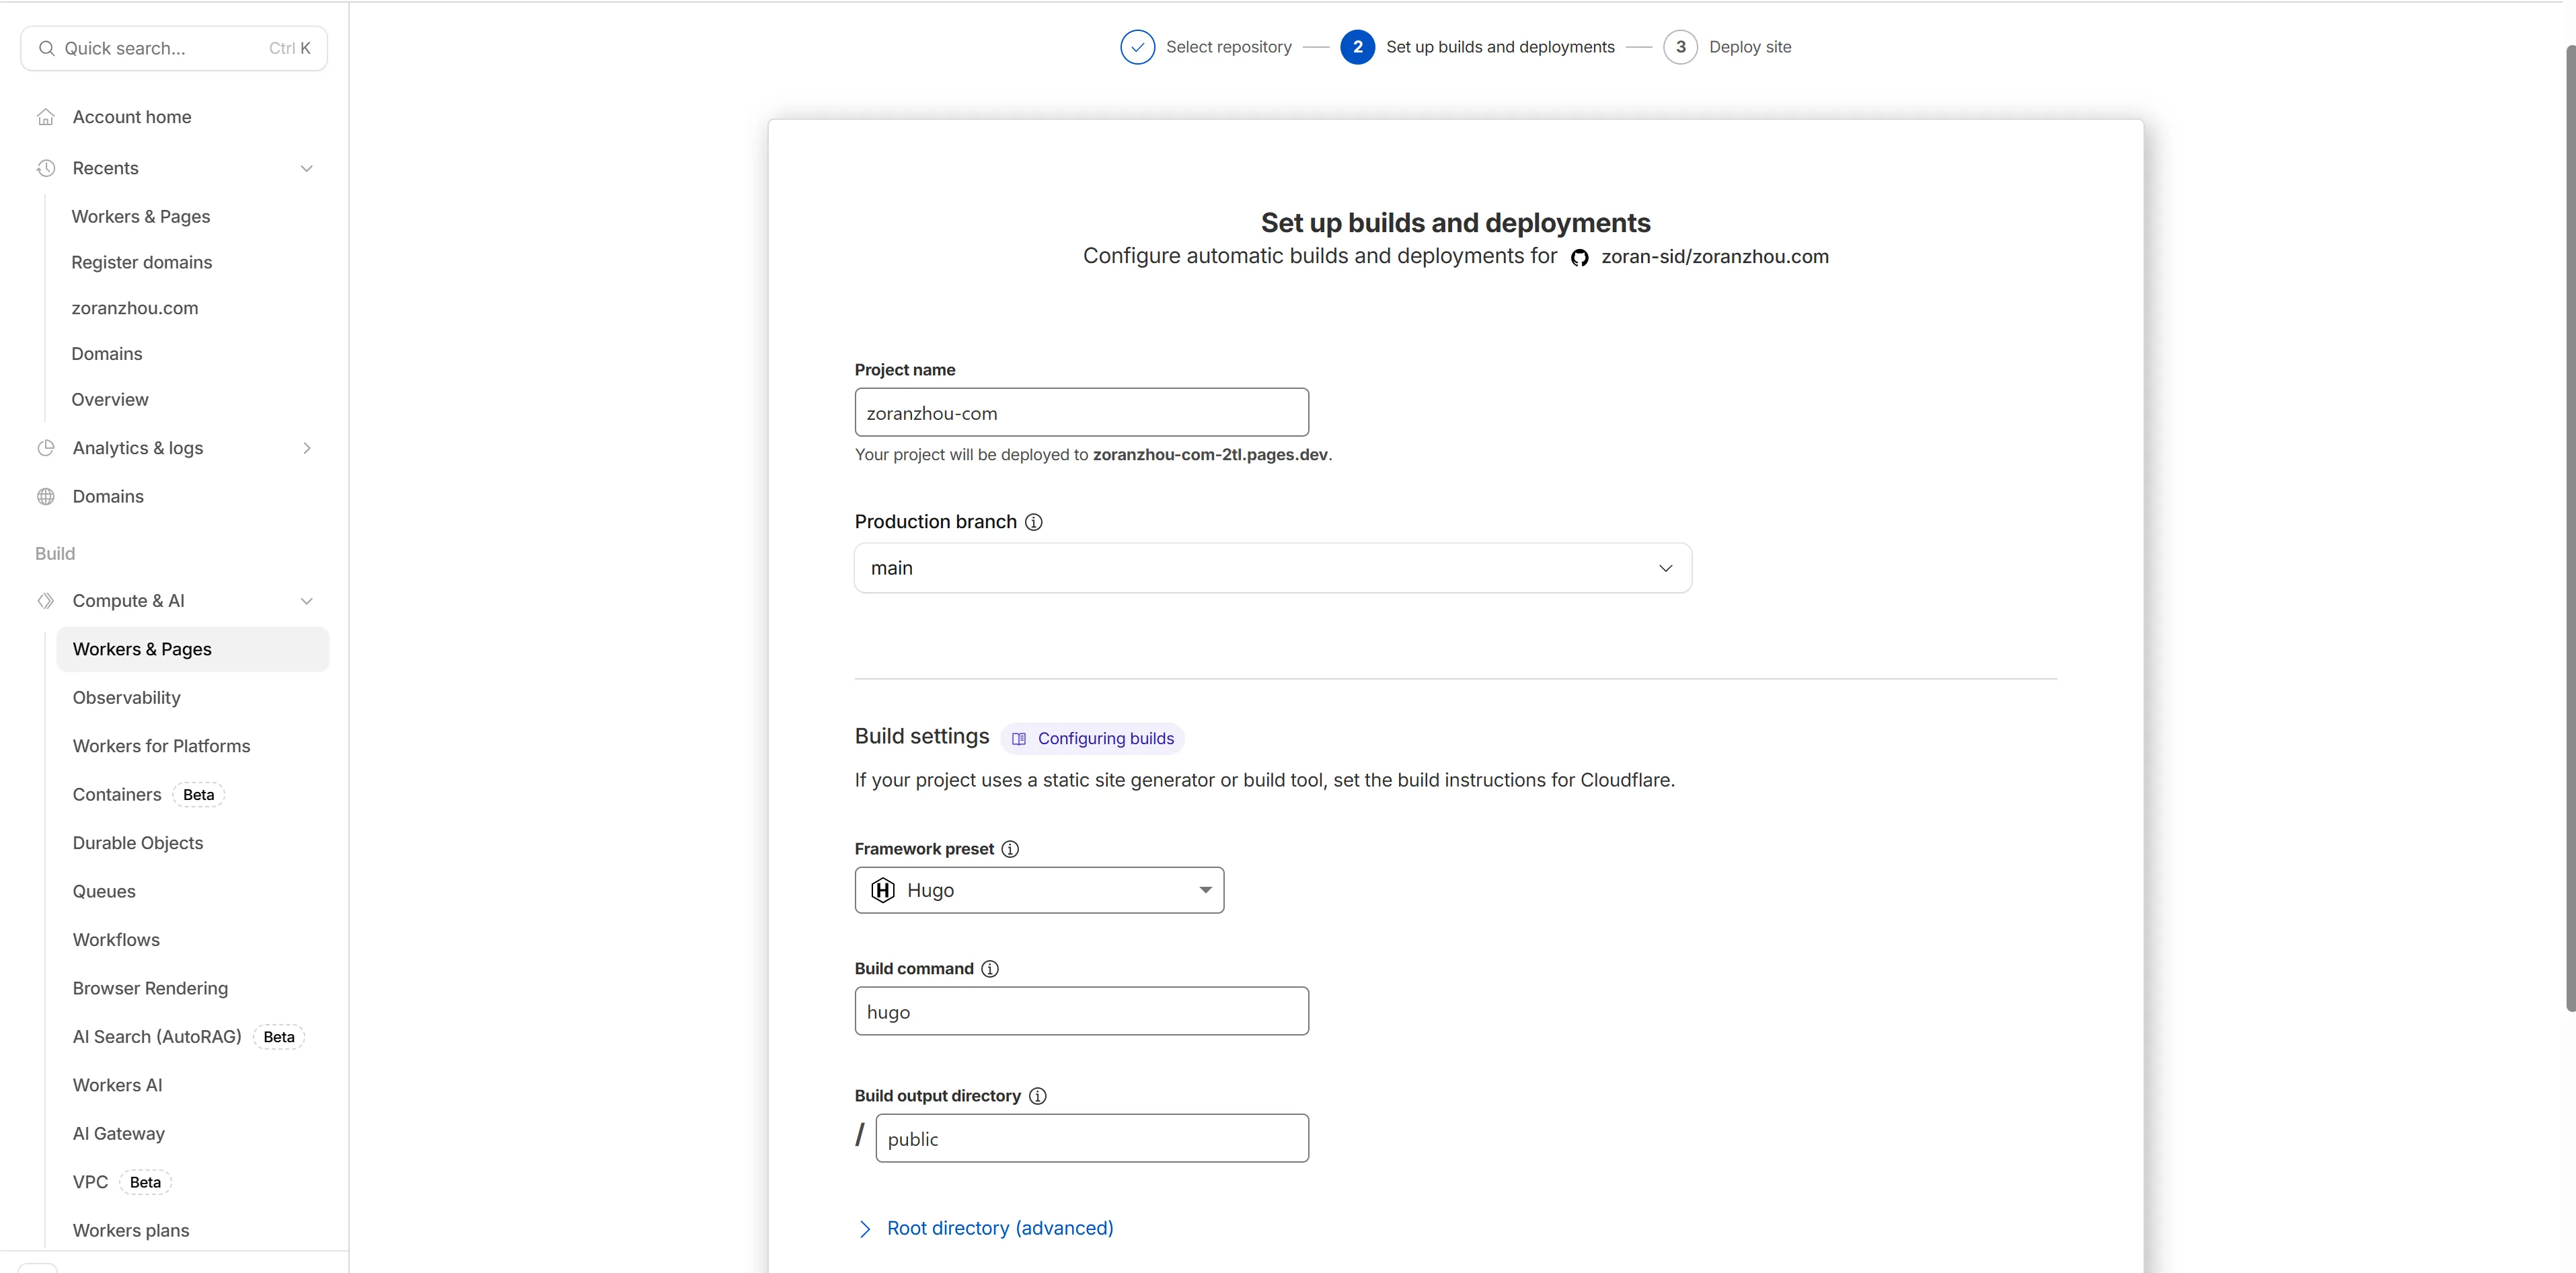
Then deploy with default settings.
Add Custom Domain
Enter your own domain name, Cloudflare will handle it automatically.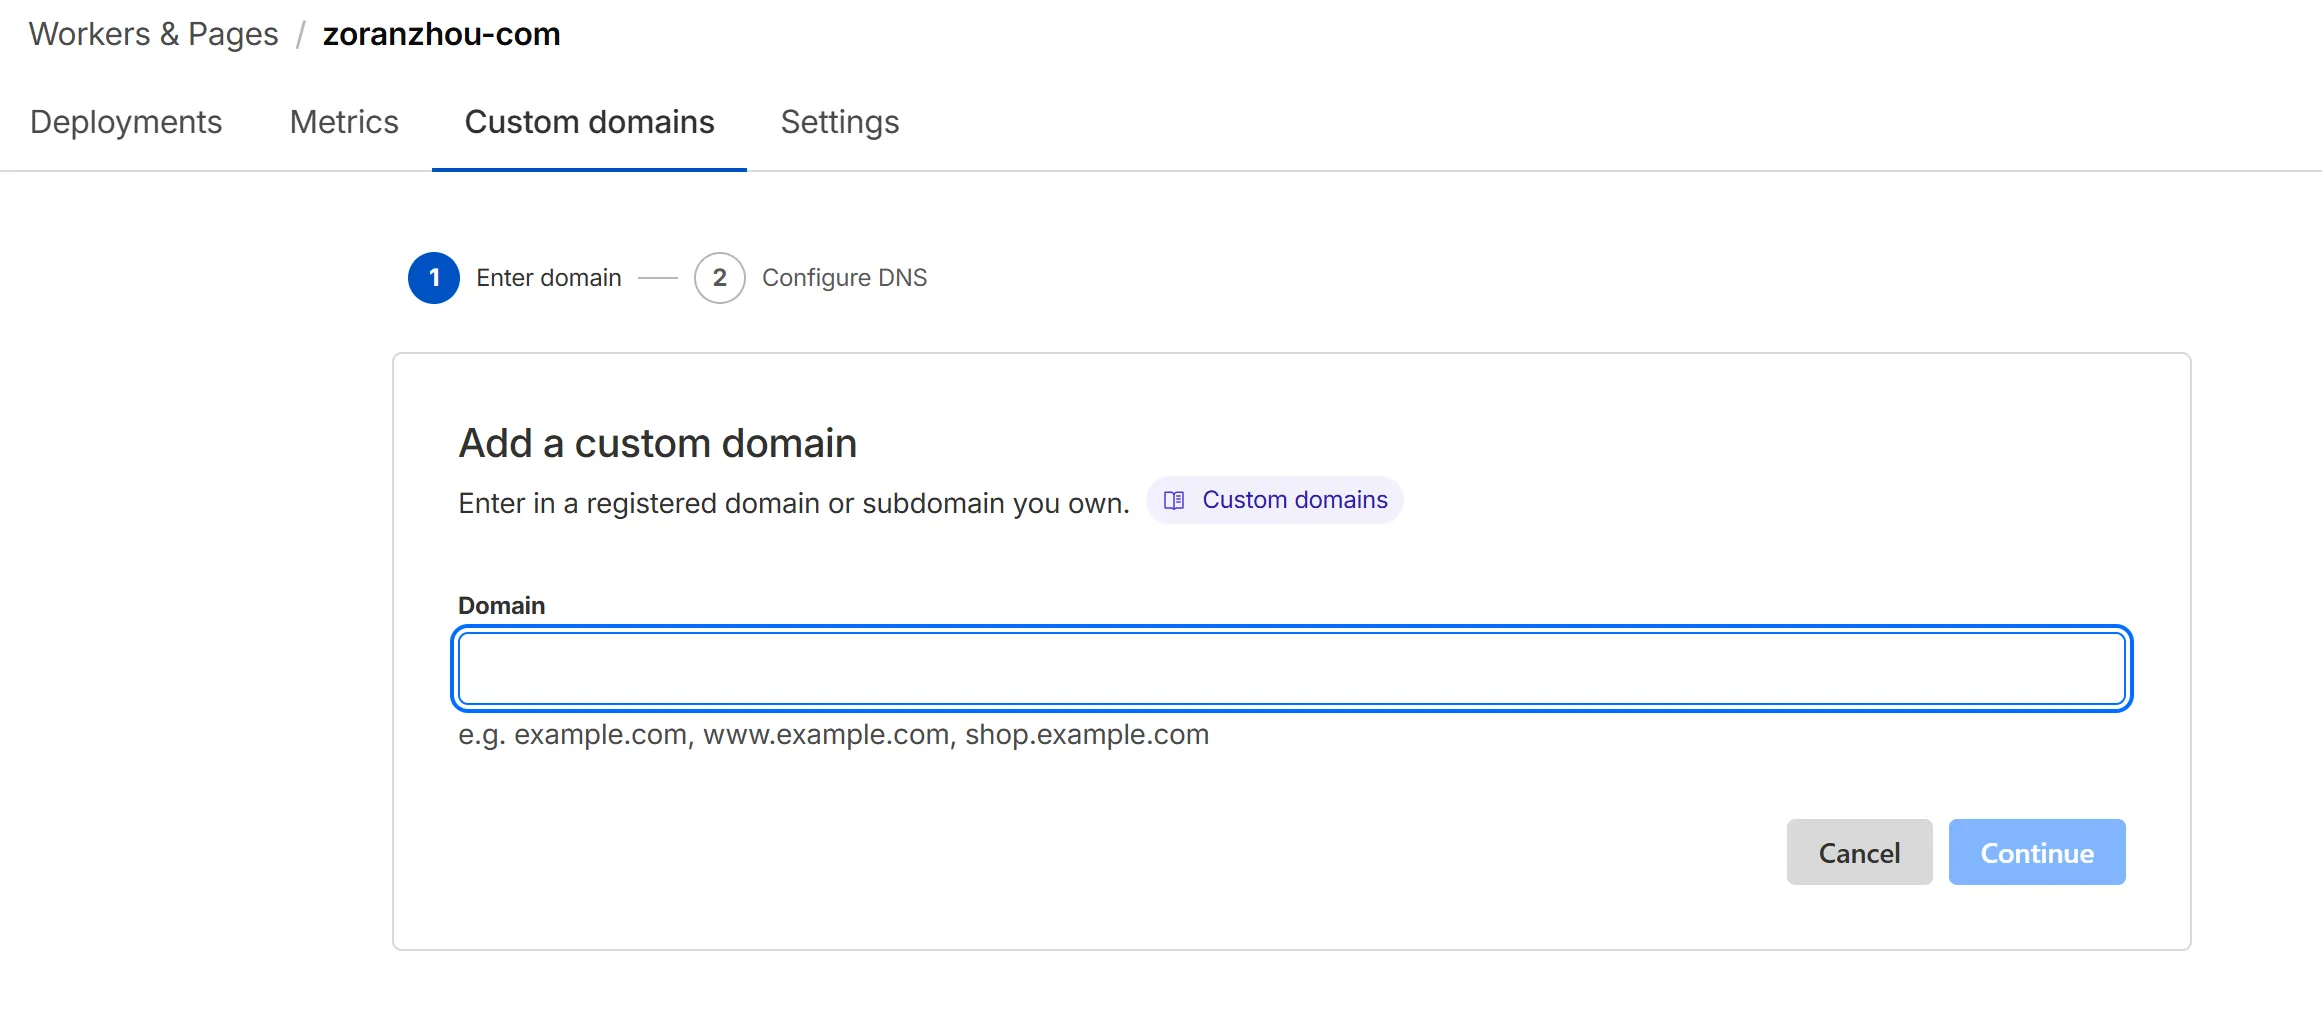
Finally, you can access your BLOG via your custom domain!
Cloudflare R2 Object Storage + WebP Cloud Proxy Acceleration
As blog content grows, the storage and loading speed of image resources become key factors affecting user experience. Here I introduce a free image storage and acceleration solution: Cloudflare R2 paired with WebP Cloud proxy.
Why This Solution?
- GitHub Repository Limits: Large numbers of images increase repository size, affecting clone and deployment speed
- Loading Speed: Loading images directly from GitHub or Cloudflare Pages results in unstable cross-border access speeds
- Format Optimization: Modern browsers support WebP format, which is smaller and loads faster
- Cost Considerations: R2 offers 10GB of free storage, and WebP Cloud provides free proxy conversion services
Cloudflare R2 Configuration
R2 is an S3 API-compatible object storage service provided by Cloudflare.
Create an R2 Bucket
- Log into the Cloudflare Dashboard, go to the R2 page
- Click Create bucket, enter a bucket name (e.g.,
blog-storage) - Choose a bucket location; it’s recommended to select Automatic to let Cloudflare optimize automatically
Configure Public Access
R2 is private by default. You need to configure public access to allow direct access to images via URL:
- Go to bucket settings, find the Public Access option
- Enable Allow Public Access
- Bind a custom domain (recommended):
- Add your subdomain in Custom Domains, e.g.,
images.yourdomain.com - Or use the proxy domain provided by WebP Cloud
- Add your subdomain in Custom Domains, e.g.,
Obtain API Credentials
For uploading images via API:
- Go to R2 → Manage R2 API Tokens
- Click Create API Token
- Select Object Read & Write permission
- Copy the Access Key ID and Secret Access Key
API Connection Info Example:
Account ID: your-account-id
Access Key ID: your-access-key
Secret Access Key: your-secret-key
Bucket: blog-storage
S3 API Endpoint: https://your-account-id.r2.cloudflarestorage.com
Upload Images to R2
You can upload using various methods:
Method 1: Cloudflare Dashboard Web Upload
- Suitable for occasional uploads of a few images
Method 2: AWS CLI / boto3 Script
- Suitable for batch uploads and automated workflows
import boto3

s3 = boto3.client(
    's3',
    endpoint_url='https://your-account-id.r2.cloudflarestorage.com',
    aws_access_key_id='your-access-key',
    aws_secret_access_key='your-secret-key',
    region_name='auto'
)

# Upload file
s3.upload_file('local-image.jpg', 'blog-storage', 'image-20250101.jpg')
Method 3: Third-party Tools (e.g., rclone, Cyberduck)
- Graphical interface, intuitive operation
WebP Cloud Proxy Acceleration
WebP Cloud (webp.fi) is a free image proxy service that can automatically convert images to WebP format and provide global CDN acceleration.
Configure WebP Cloud
- Visit the WebP Cloud official website
- Register an account and add your R2 bucket as the source
- Configure a custom domain (optional)
Usage
Suppose your R2 image’s original link is:
https://your-bucket.your-account-id.r2.cloudflarestorage.com/image.jpgAfter WebP Cloud proxy:
https://your-proxy.webp.fi/image.jpgWebP Cloud will automatically:
- Convert images to WebP format (when supported by the browser)
- Compress image size
- Accelerate globally via Cloudflare CDN
Using in Your Blog
Reference in Hugo Markdown posts:
Complete Workflow Example
- When writing posts, save images locally
- Upload images to the R2 bucket
- Get the WebP Cloud proxy link
- Reference the proxy link in Markdown
- Deploy the blog, images will automatically load accelerated via WebP Cloud
Cost & Quotas
| Service | Free Tier | Overage |
|---|---|---|
| Cloudflare R2 | 10GB storage/month | $0.015/GB/month |
| Cloudflare R2 | 1 million requests/month | $0.36/million |
| WebP Cloud | Unlimited (currently free) | Free |
For personal blogs, the free tier is more than sufficient.
Summary
The advantages of this solution:
- ✅ Completely Free: R2 + WebP Cloud are free for personal users
- ✅ Global Acceleration: Cloudflare CDN covers the globe
- ✅ Automatic Optimization: WebP format auto-compression, improving loading speed
- ✅ Good Compatibility: S3 API standard, rich tool ecosystem
- ✅ Integrates with Existing Workflow: Does not affect the Hugo + GitHub + Cloudflare Pages deployment process
With this solution, your blog images can achieve fast, stable, and low-cost global distribution.