Minecraft Local Server Deployment Tutorial
Virtualized Minecraft multiplayer control panel with NAT traversal
The Traditional Approach
The most common multiplayer setup online is to rent a VPS and use its public IP for port forwarding. This is the simplest method, but VPS performance is often tied to your budget. If you’re on a tight budget, the hardware struggles to keep up with Minecraft’s requirements.
So, can we leverage local computing power and use NAT traversal to improve performance and make the multiplayer experience smoother?
In this guide, I’ll use VMware Workstation to set up a local Minecraft server.
Note: The following setup requires foundational networking knowledge!
Installing Ubuntu
Deploy Ubuntu system on VMware Workstation.
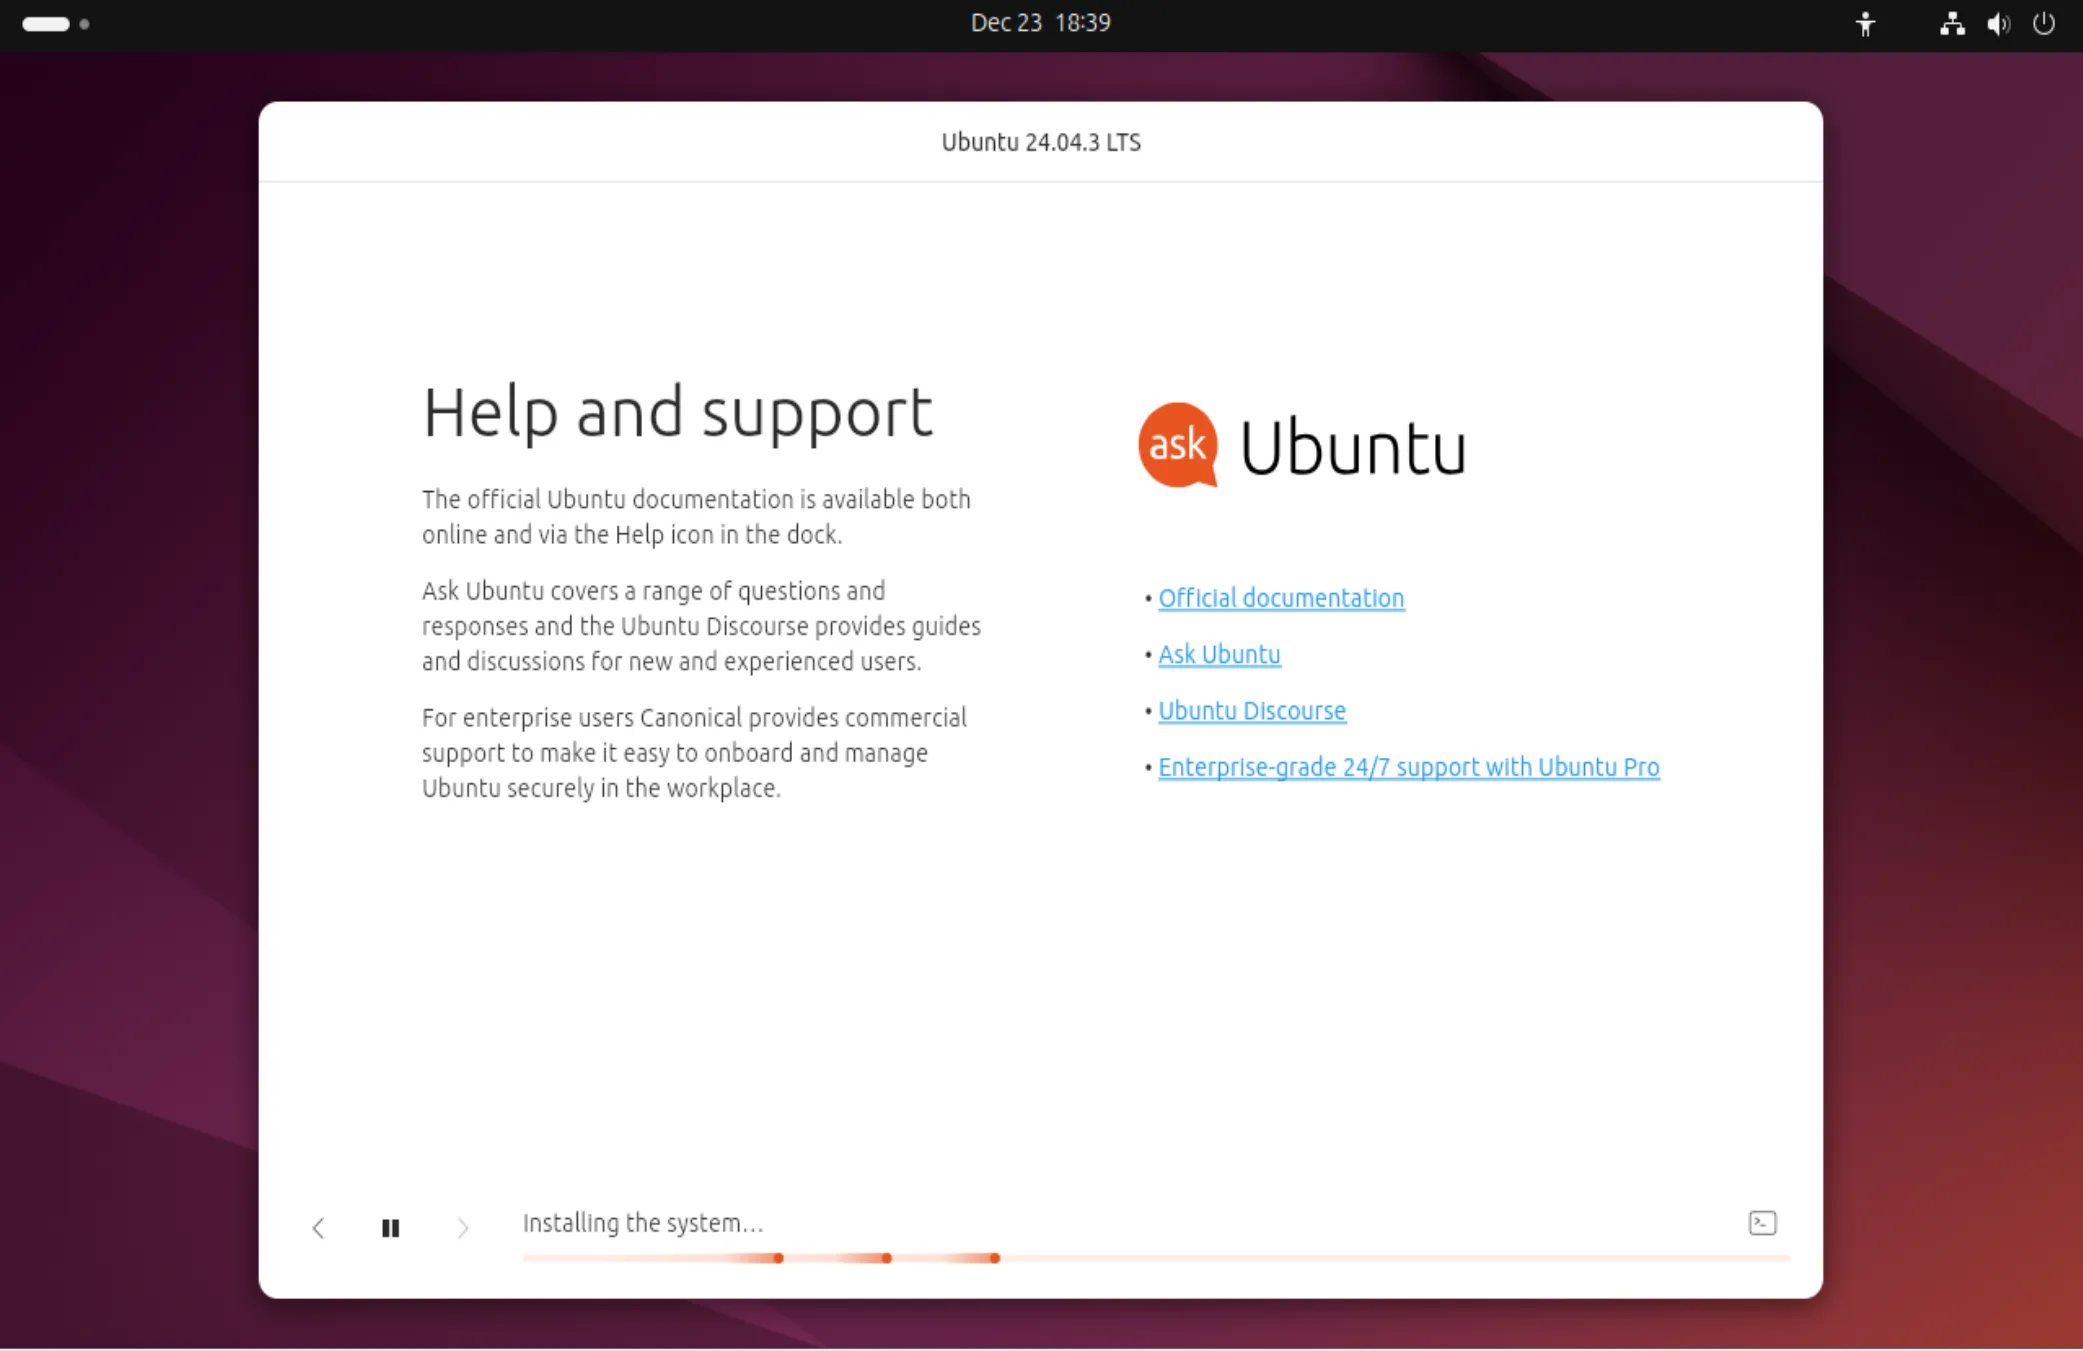
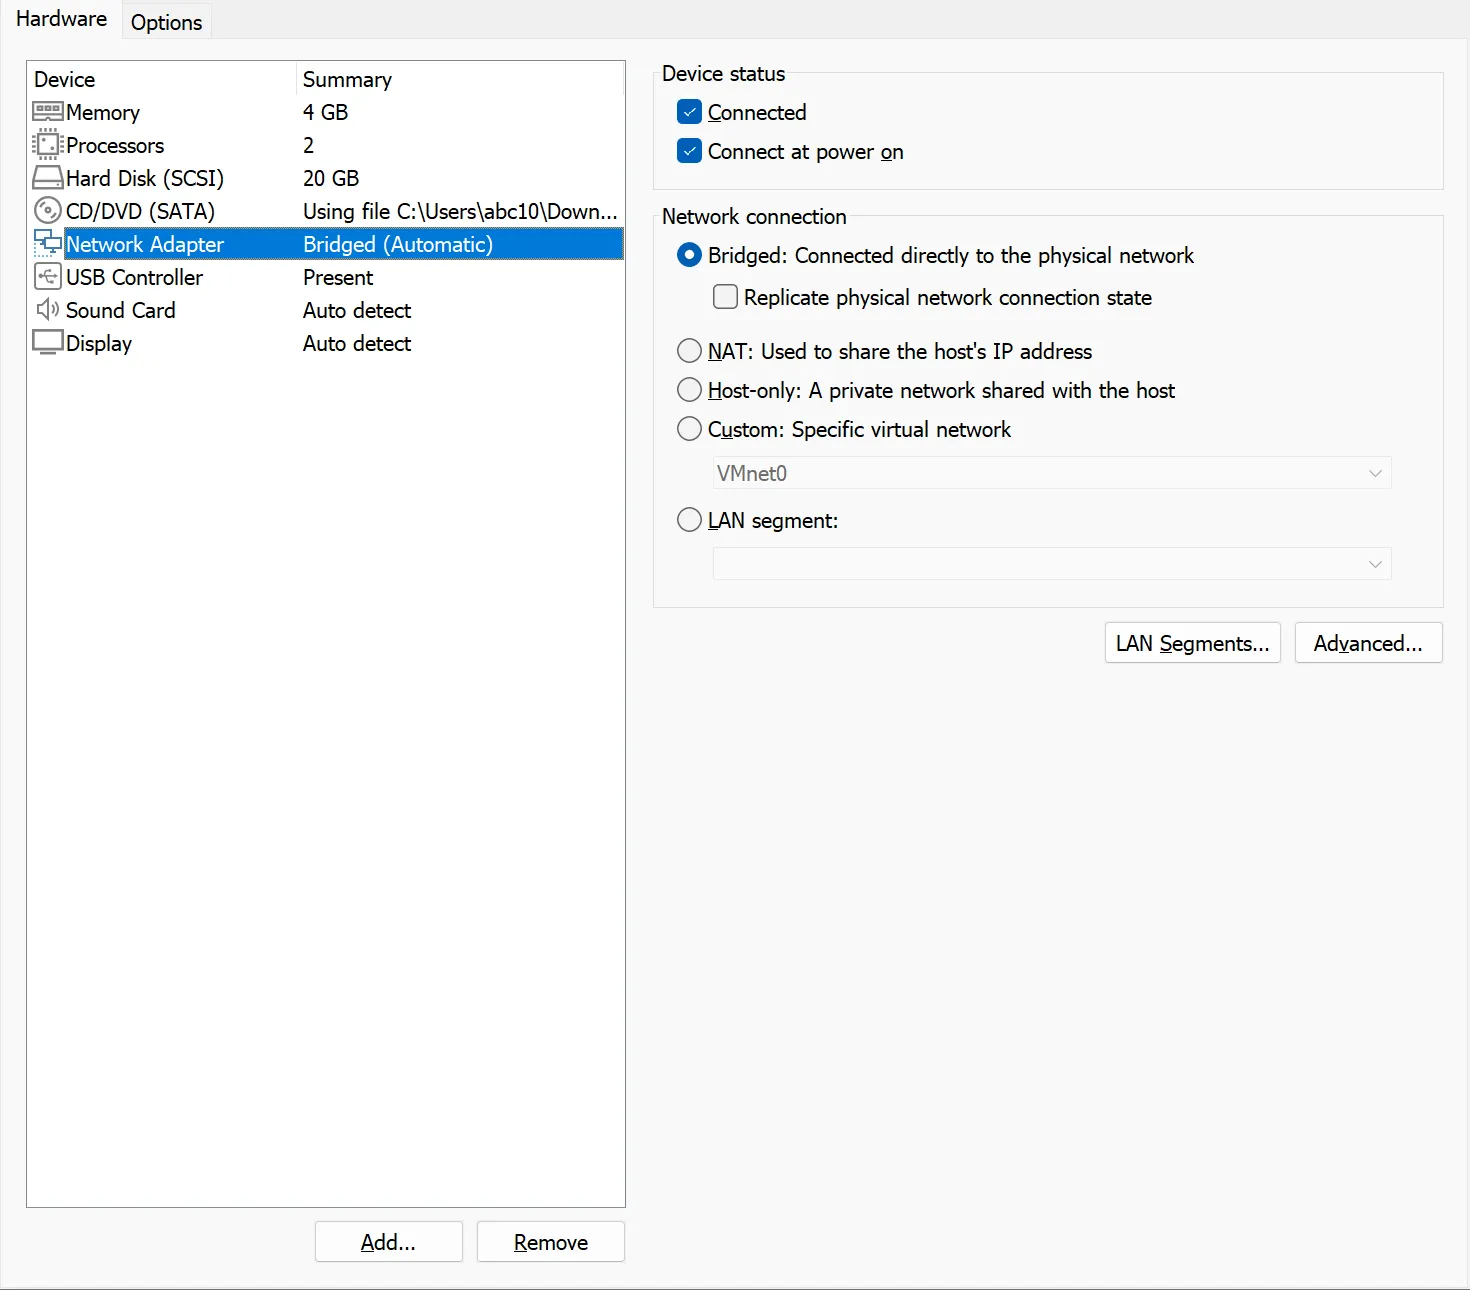
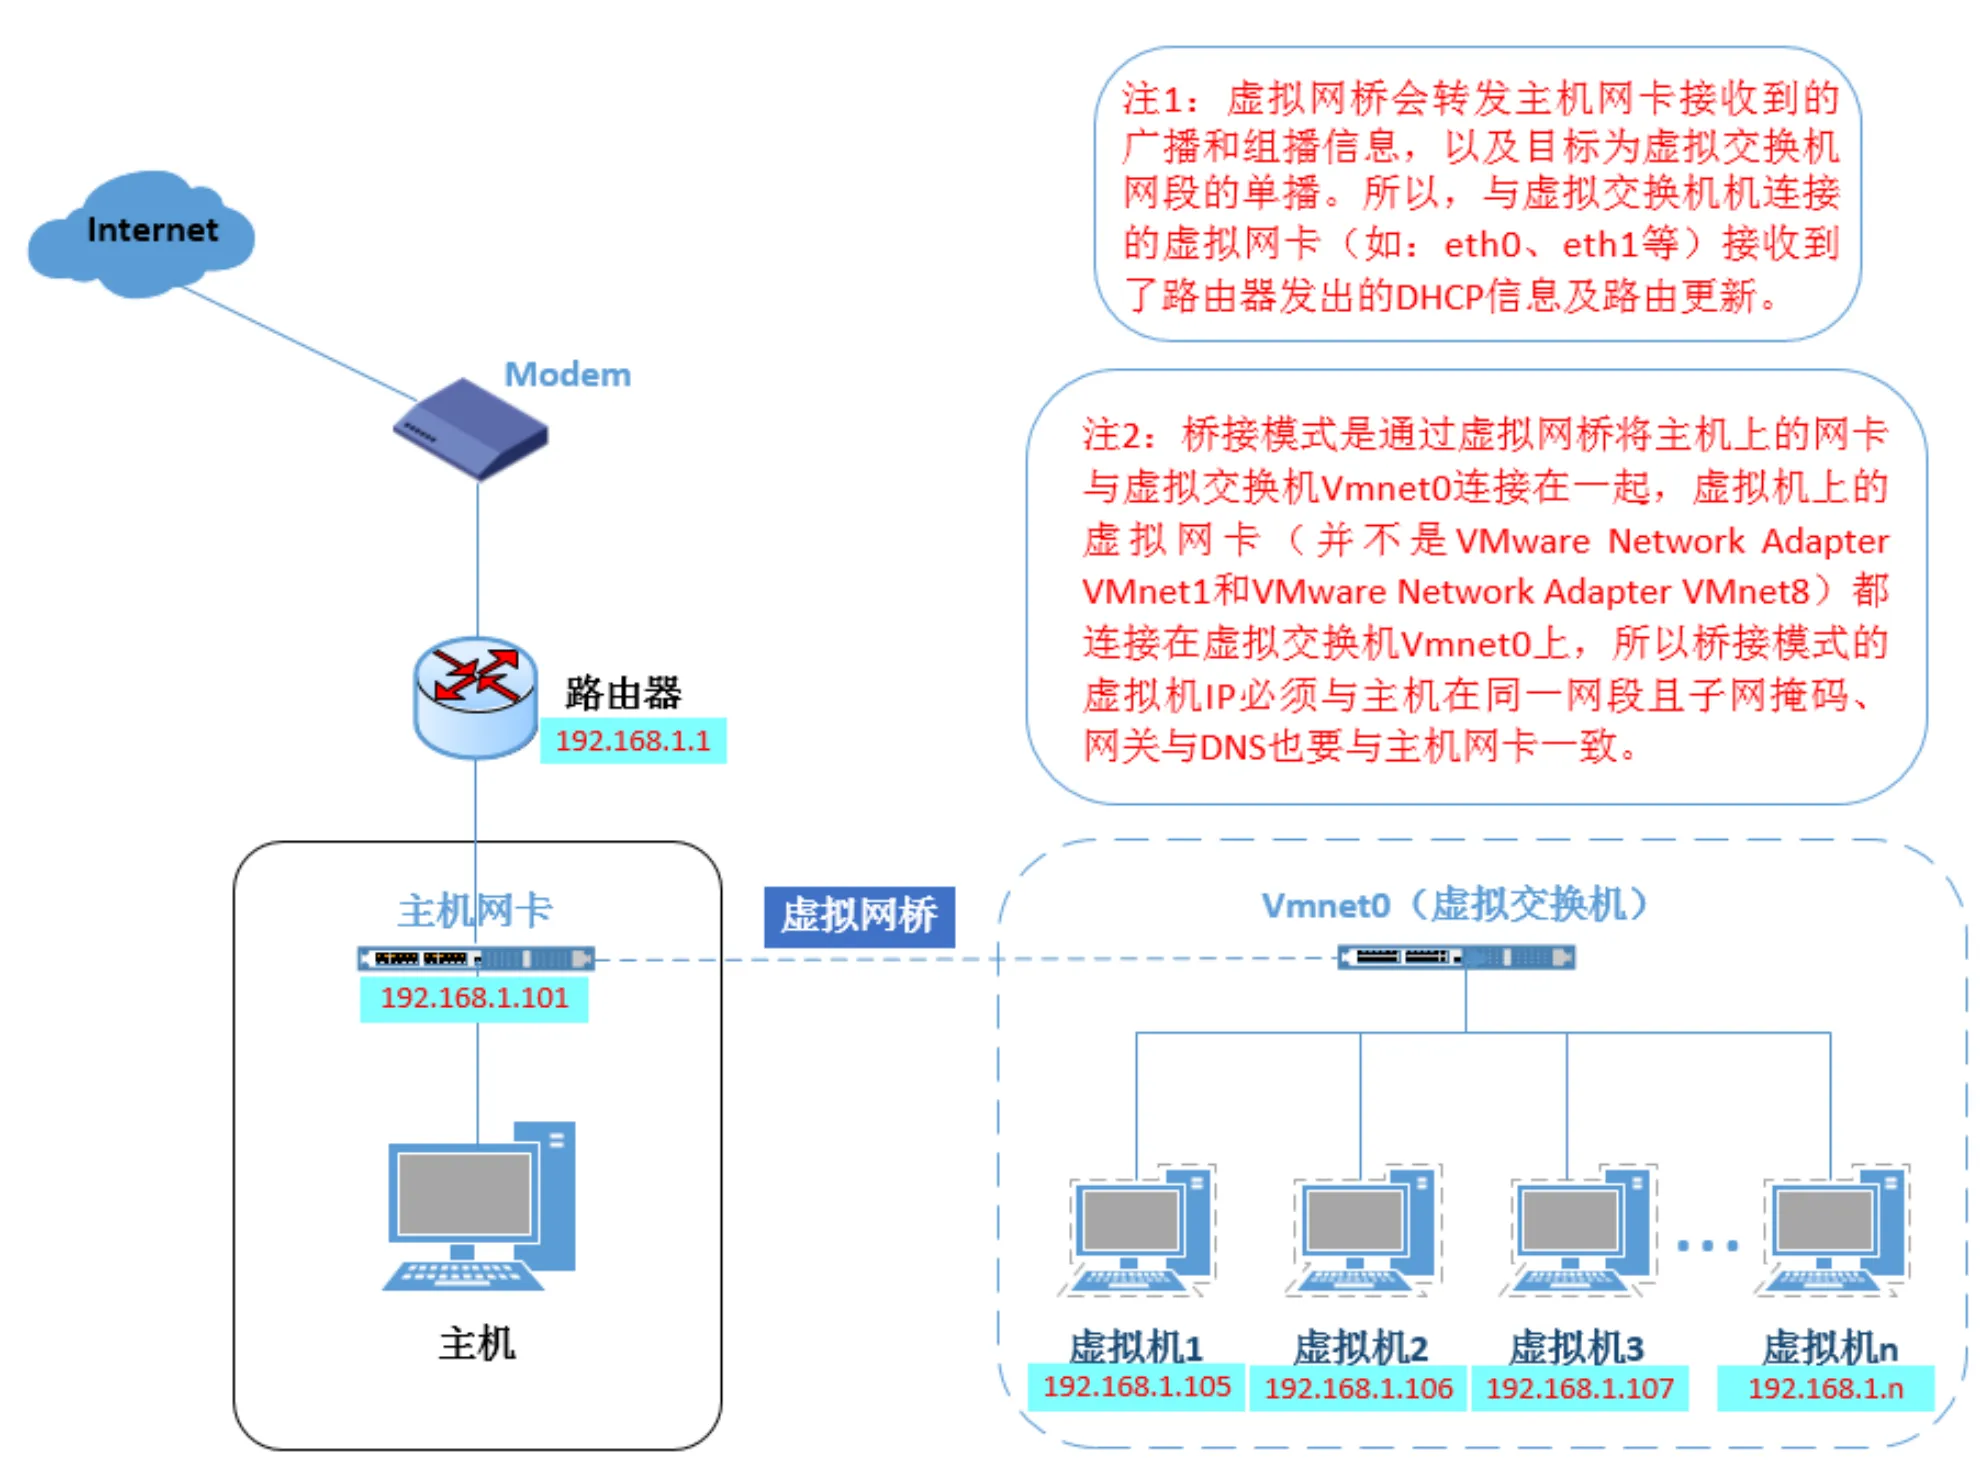
For convenient NAT traversal later, choose bridged mode for the VM (this mode allows the virtual machine to directly connect to the network card, with the card connected to the router via wired network). The end result is that Ubuntu directly connects to the router. Then modify the IP address in Ubuntu’s GUI to be on the same subnet as the router.
Bridging principle:
Then install the control panel suite in Terminal:
sudo su -c "wget -qO- https://script.mcsmanager.com/setup_cn.sh | bash"

# Start the panel daemon process first.
# This is the service process for process control and terminal management.
systemctl start mcsm-daemon.service
# Then start the panel web service.
# This is the service that enables web access and user management.
systemctl start mcsm-web.service

# Restart panel commands
systemctl restart mcsm-daemon.service
systemctl restart mcsm-web.service

# Stop panel commands
systemctl stop mcsm-web.service
systemctl stop mcsm-daemon.service
Then access the control panel via {IP}:23333 and do initial configuration.
Install the Java JDK 21 environment required by Minecraft:
sudo apt install openjdk-21-jdk
java -version
NPS Server Configuration
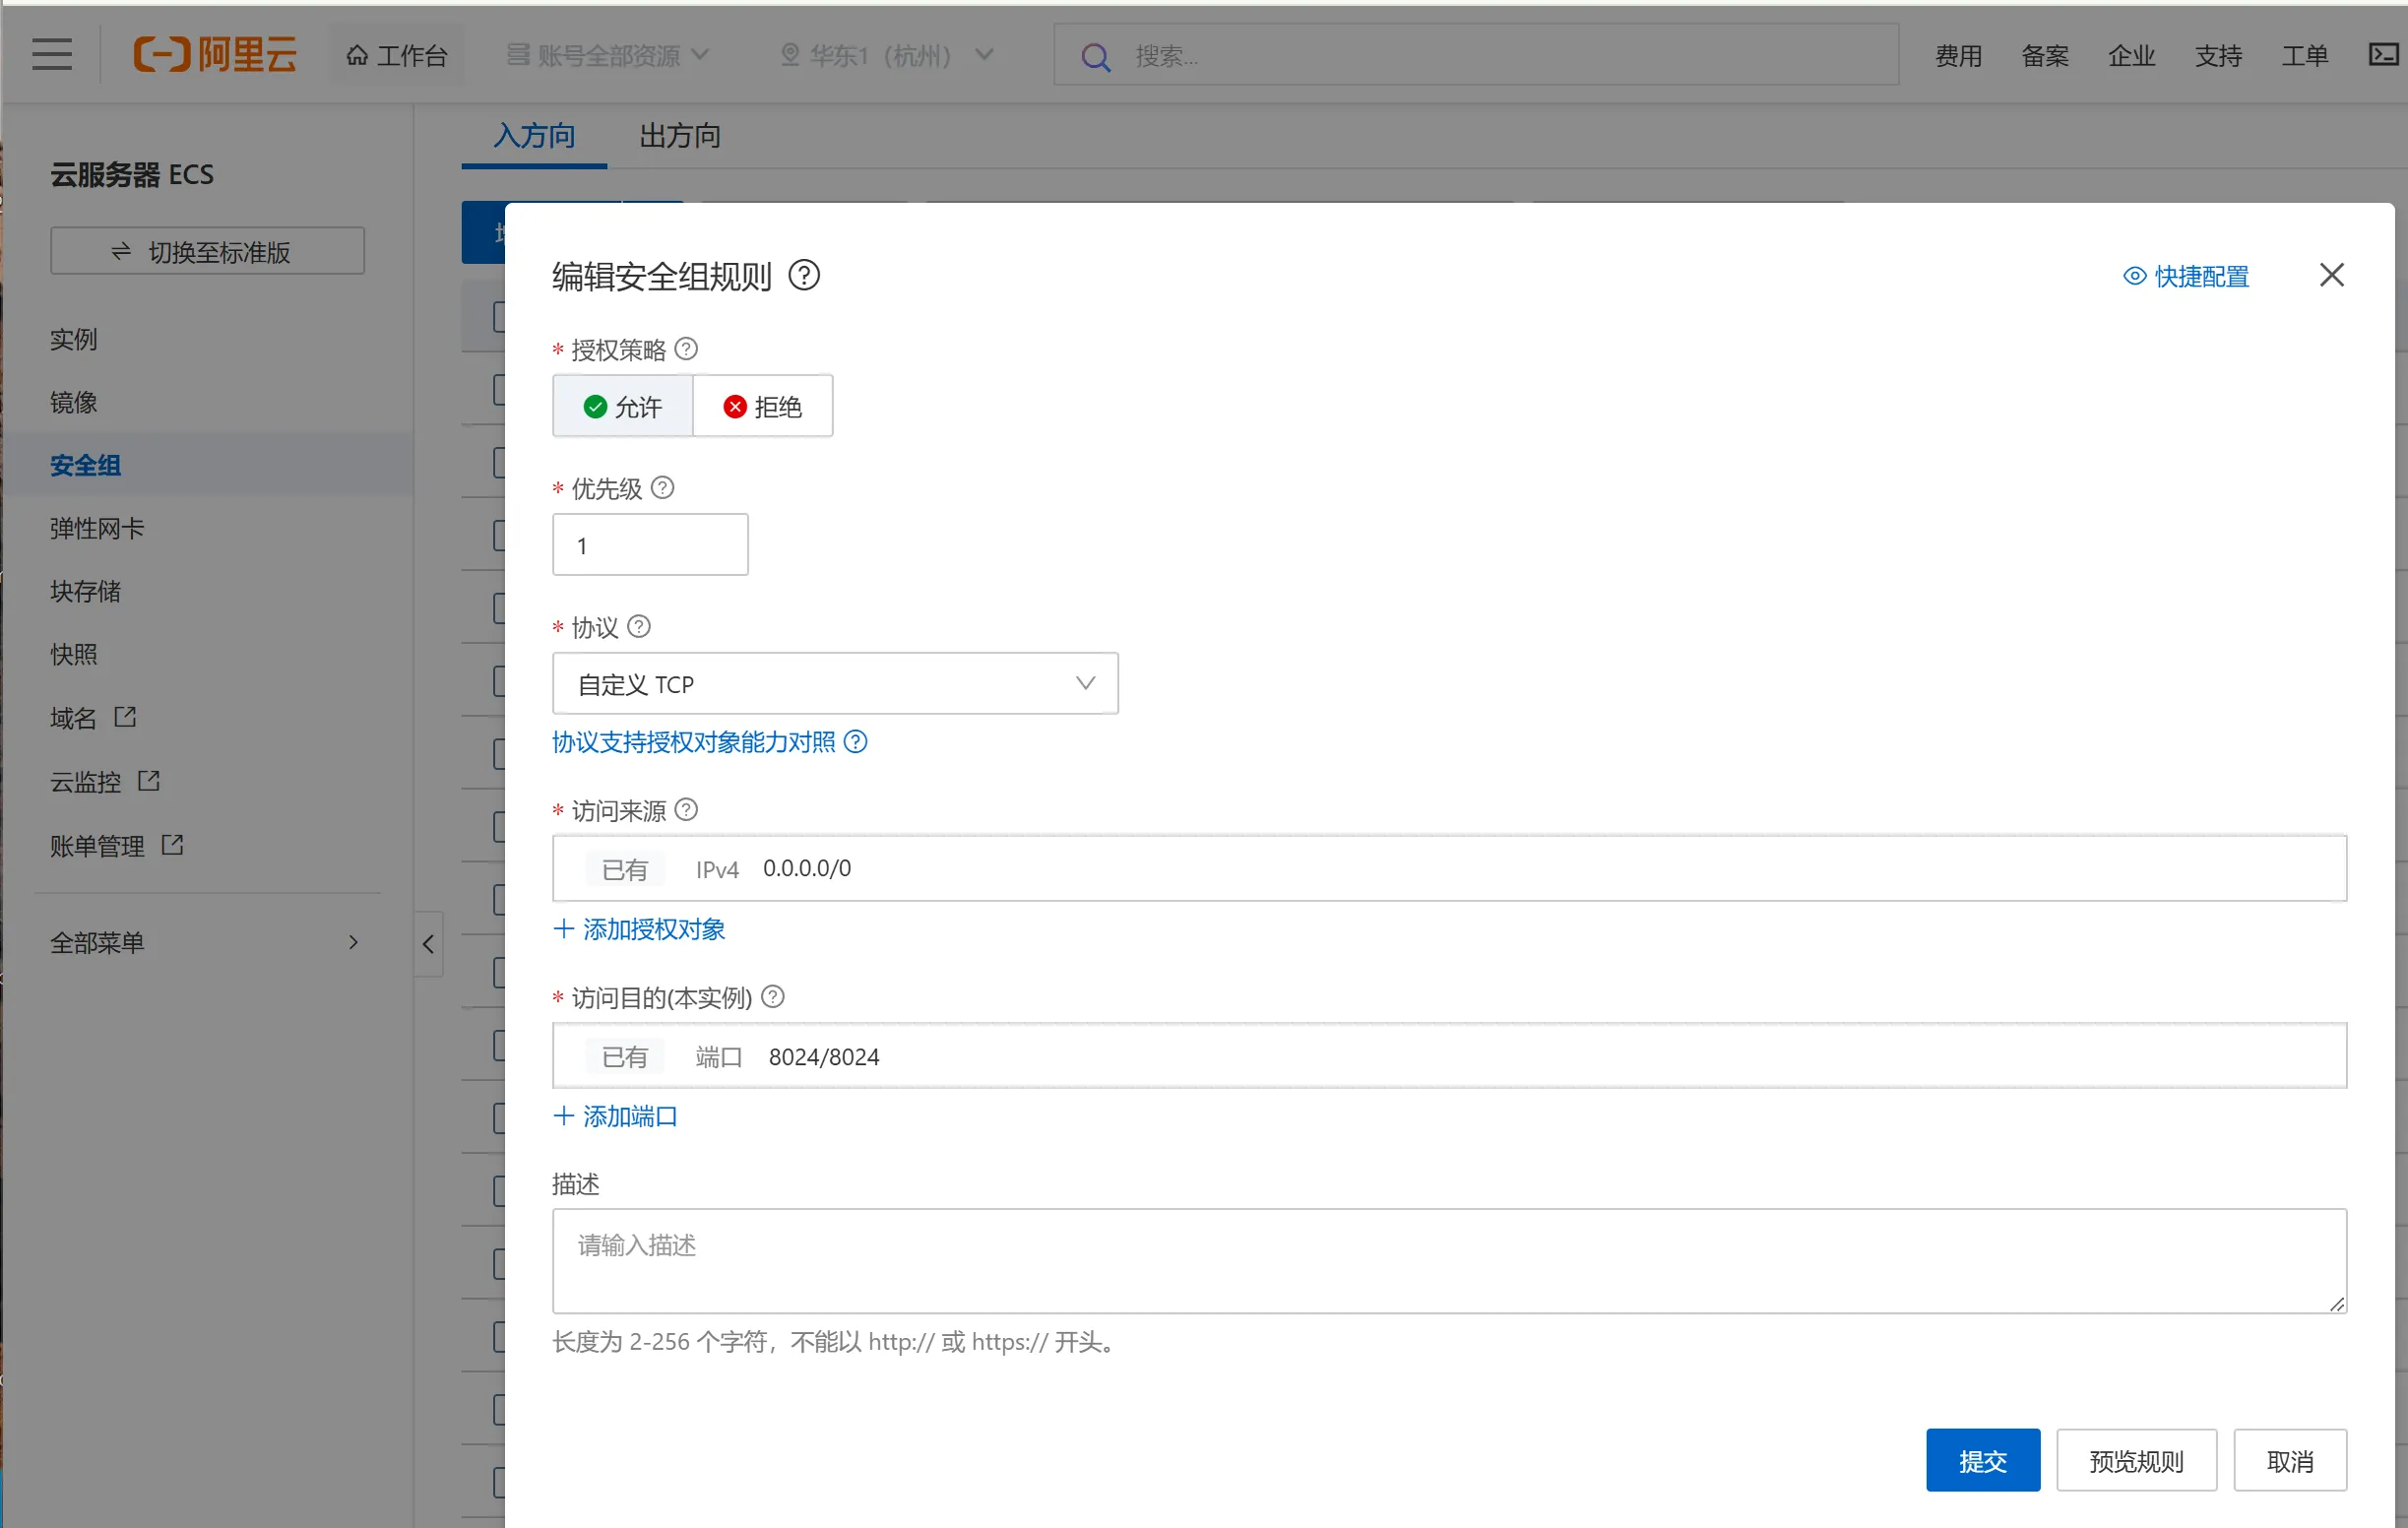
Open ports 80/443/8080/8024 on the VPS firewall for NAT traversal mapping.
sudo ./nps install
The default configuration file of nps use 80,443,8080,8024 ports
80 and 443 ports for host mode default ports
8080 for web management access port
8024 for net bridge port, to communicate between server and client

Configure conf/nps.conf
#web
web_username=xxx           // Username
web_password=xxx           // Password
web_port = 8080         // Default 8080 port for login
web_ip=0.0.0.0
NPS auto-start on boot:
systemctl enable Nps
Open firewall ports — here using Alibaba Cloud as an example:
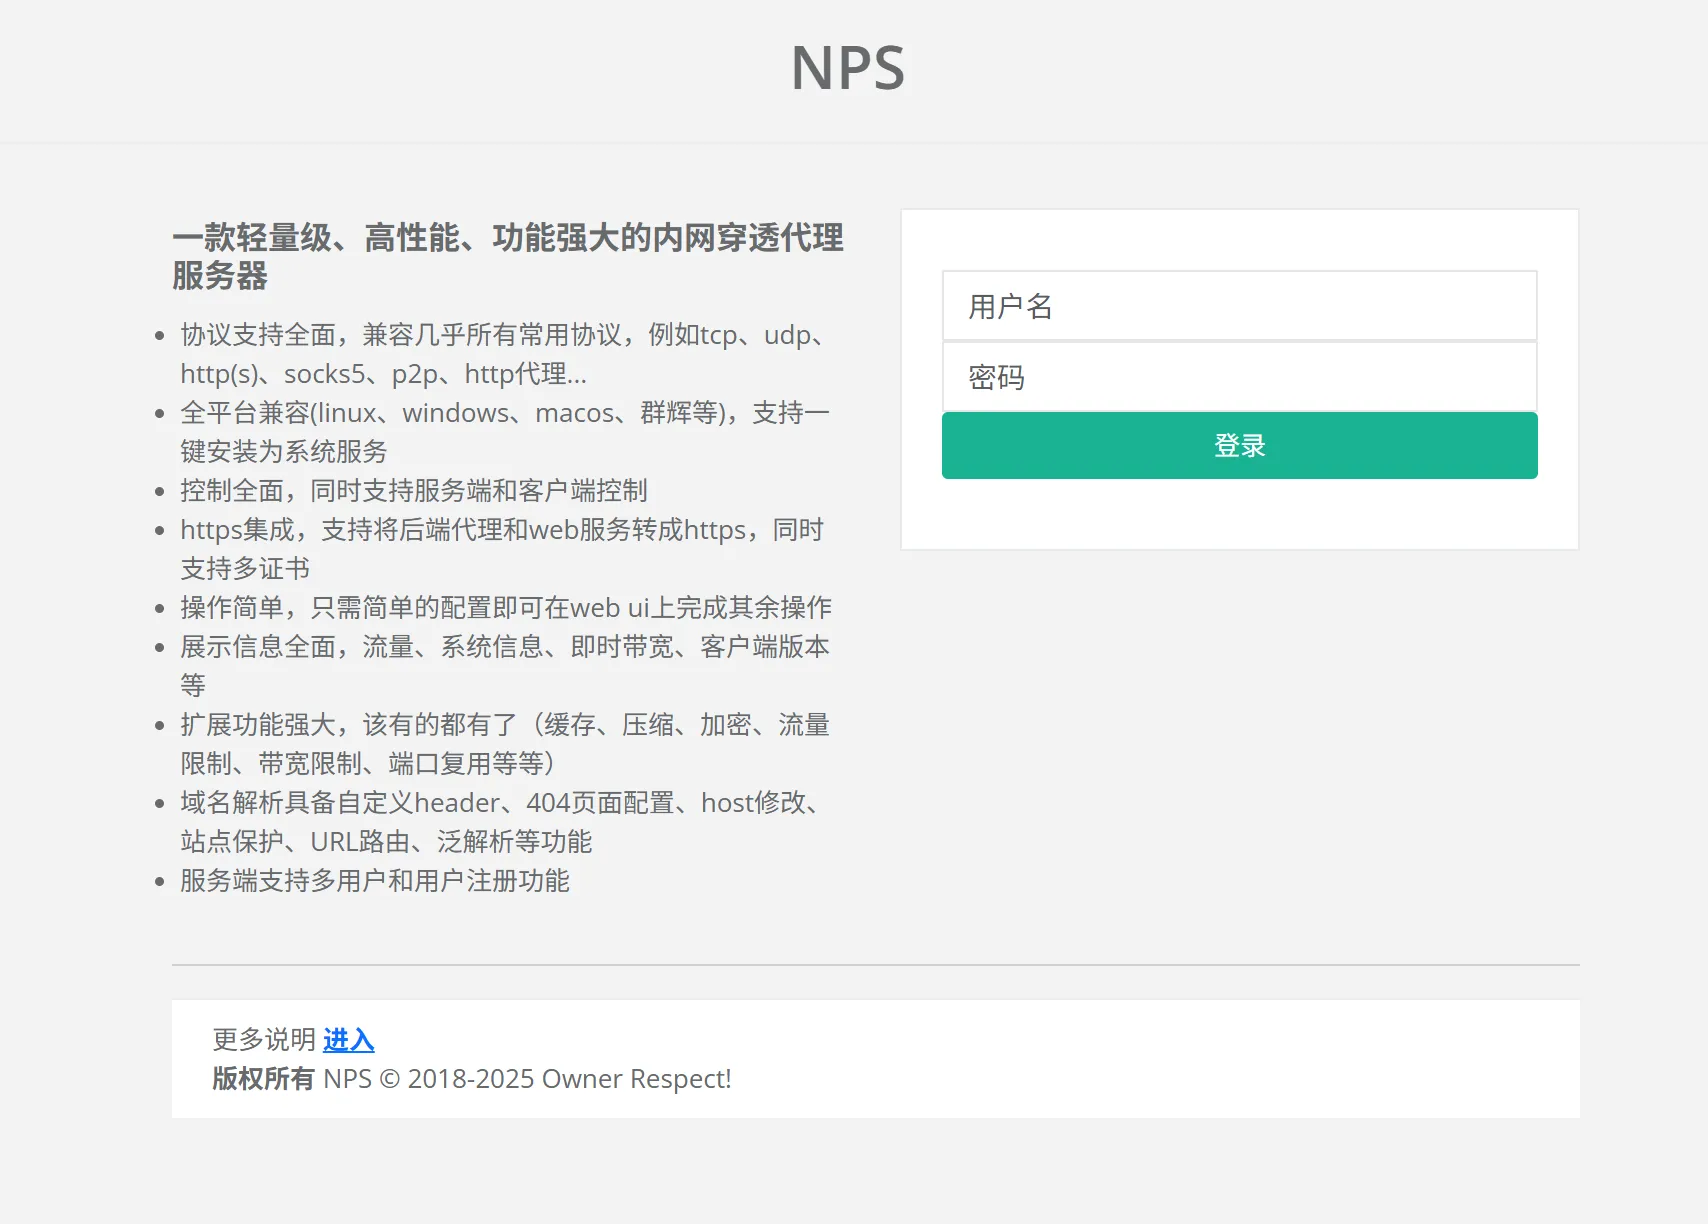
Access the server control panel via {IP/domain}:8080:
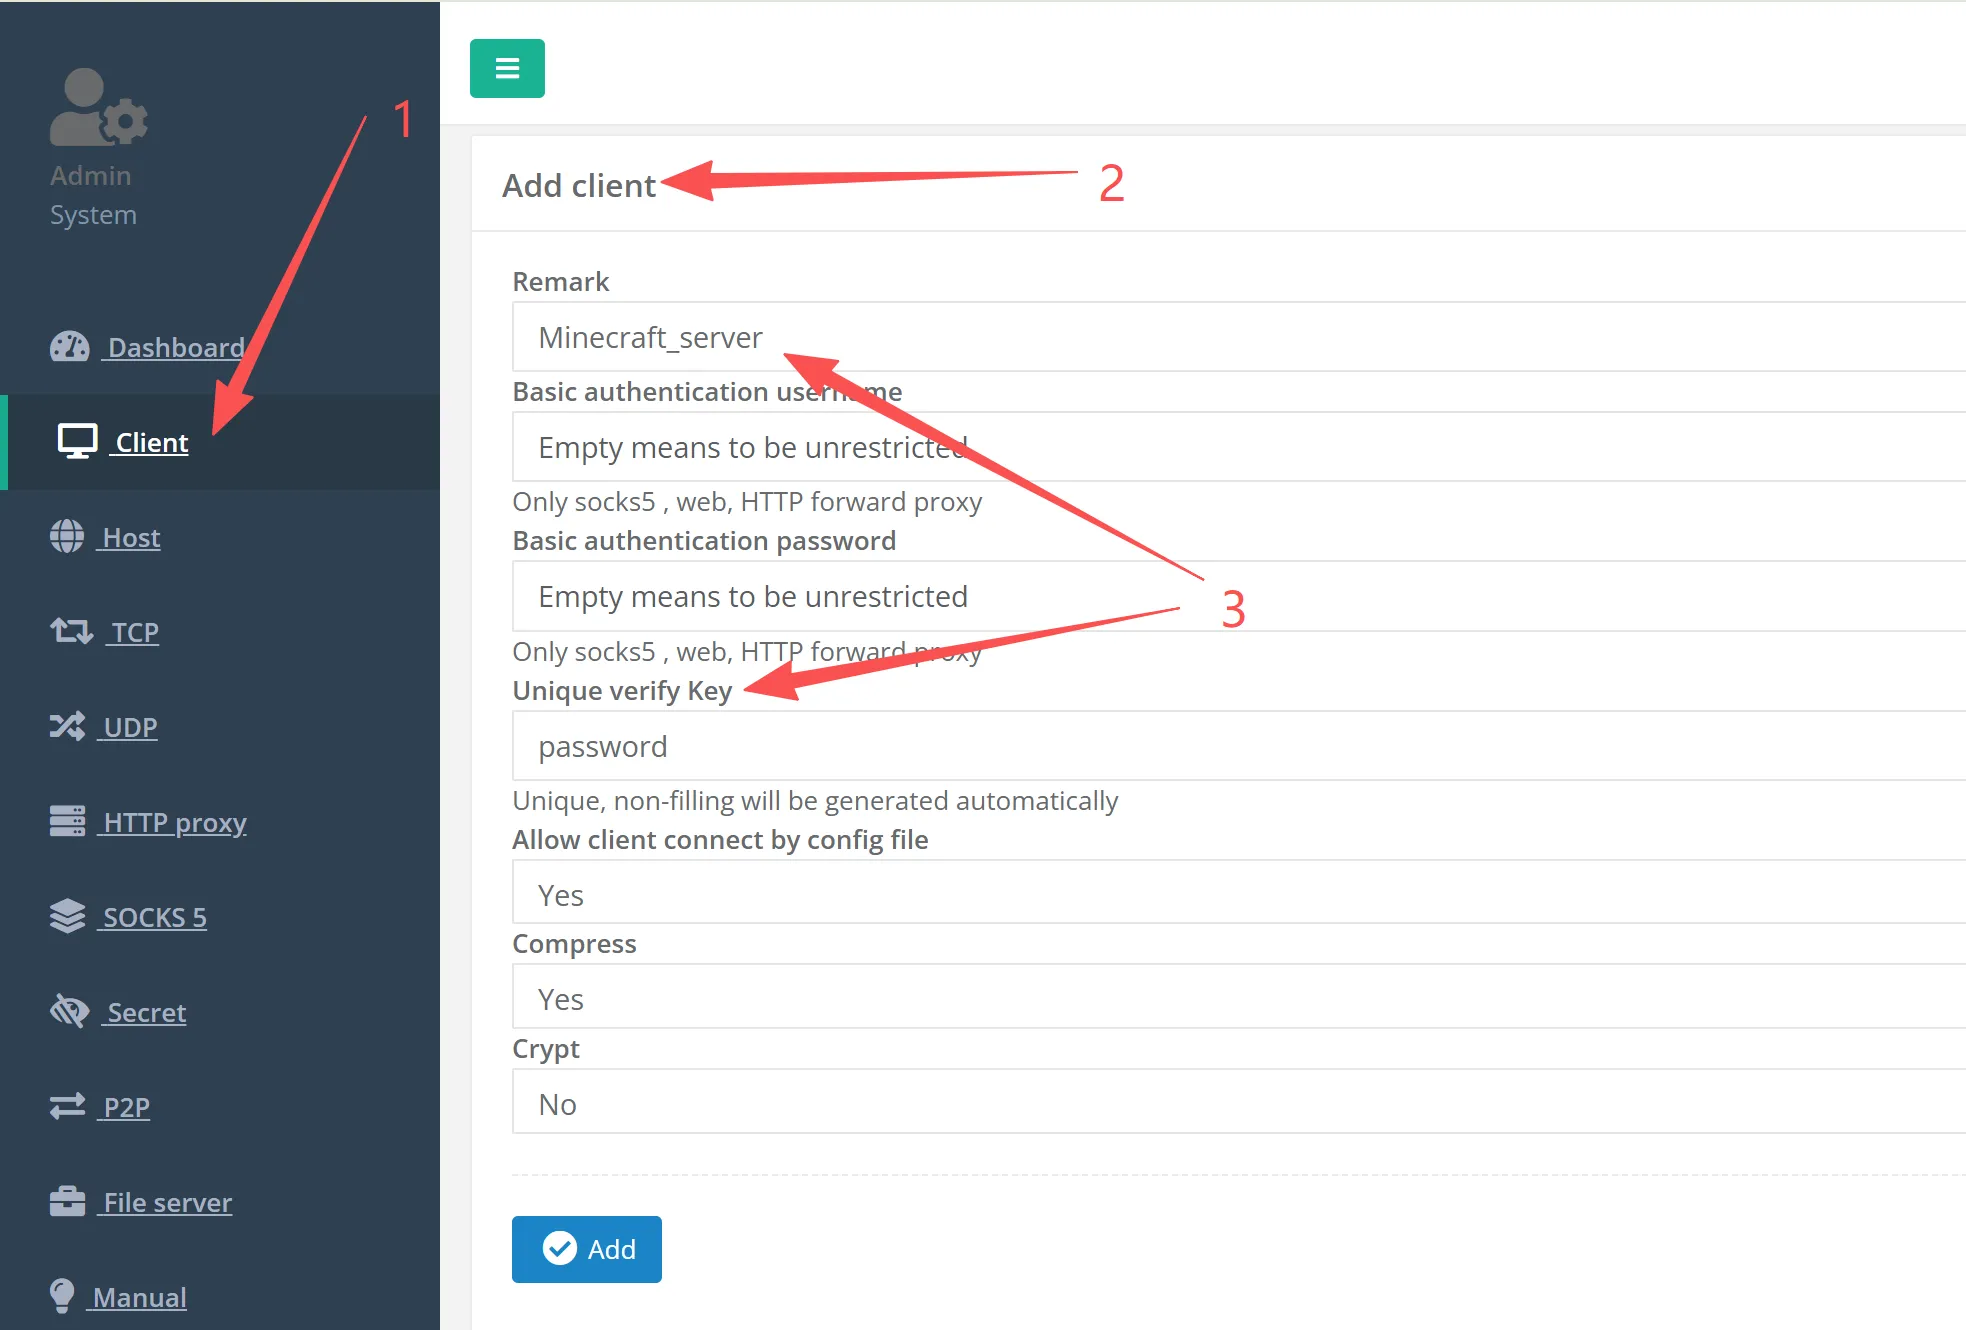
Create client list:
Create client tunnel to port 25565 (game default port is 25565, can be modified as needed):
Note: Remember to allow port 25565 in firewall rules.

Configure Server Port:
Server port: 25565
Target:{127.0.0.1/intranet IP}:25565  // Map public port 25565 to private port 25565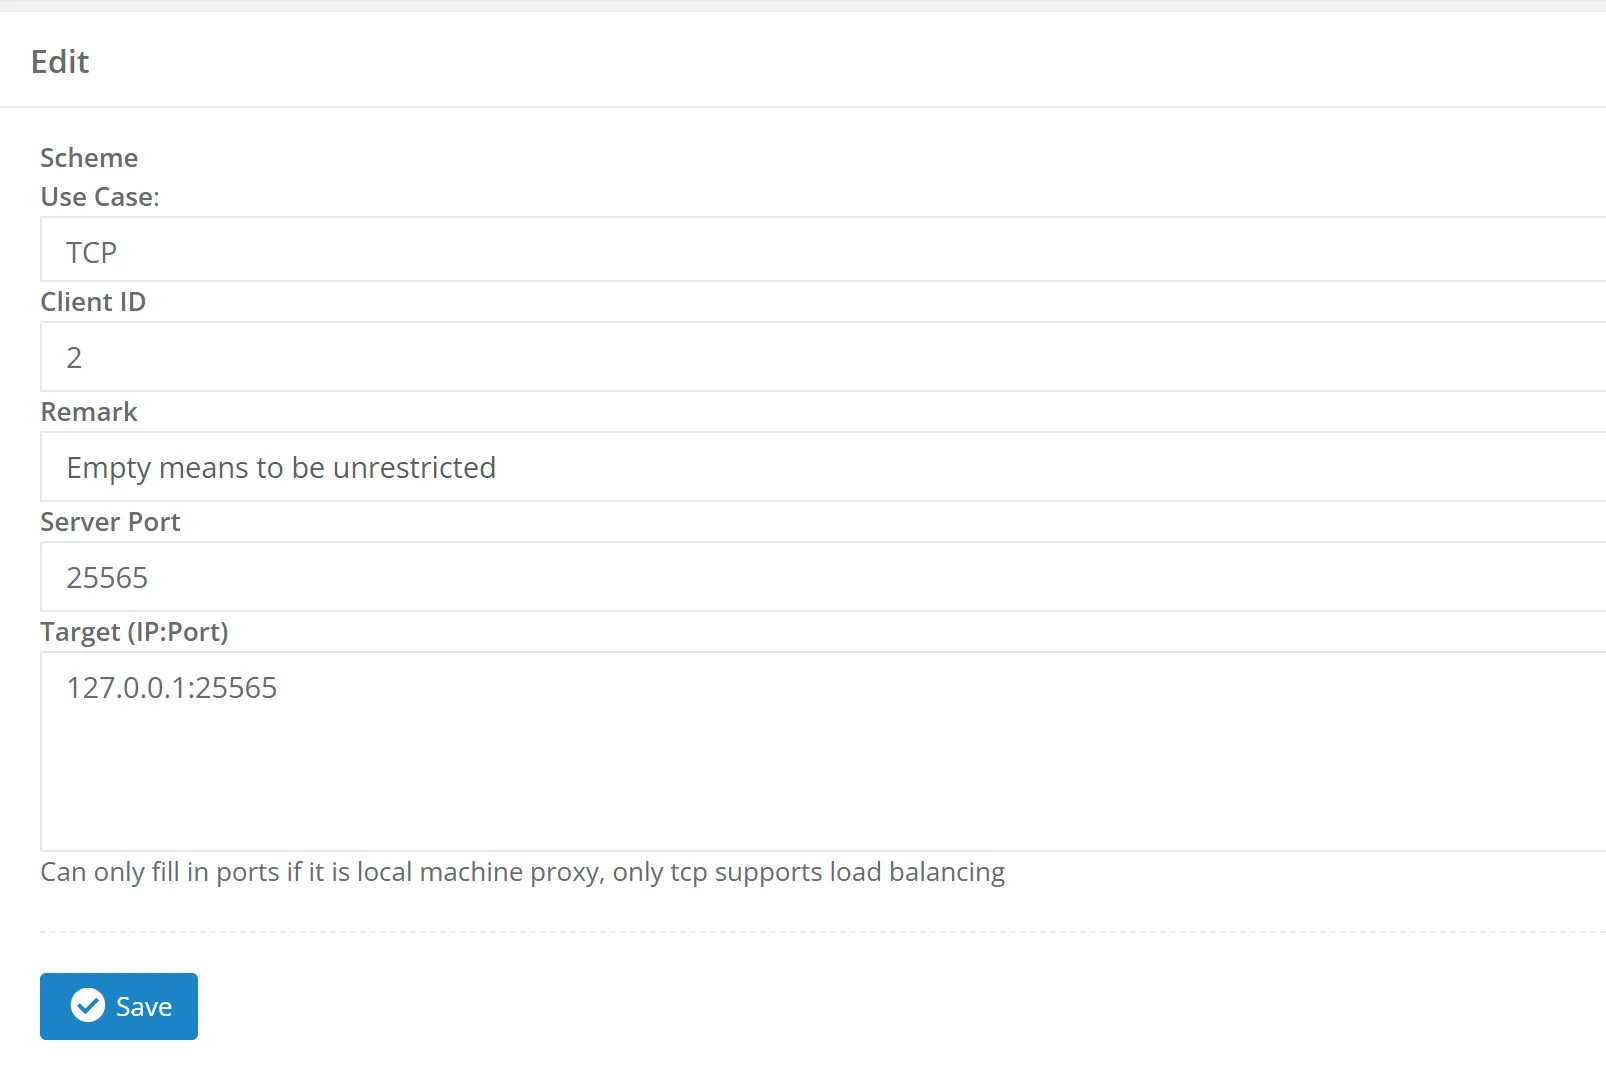
VM Ubuntu NPS Client Service
Install NPS Client, run NAT traversal configuration according to NPS Server prompts:
wget https://github.com/ehang-io/nps/releases/download/v0.26.10/linux_386_client.tar.gz
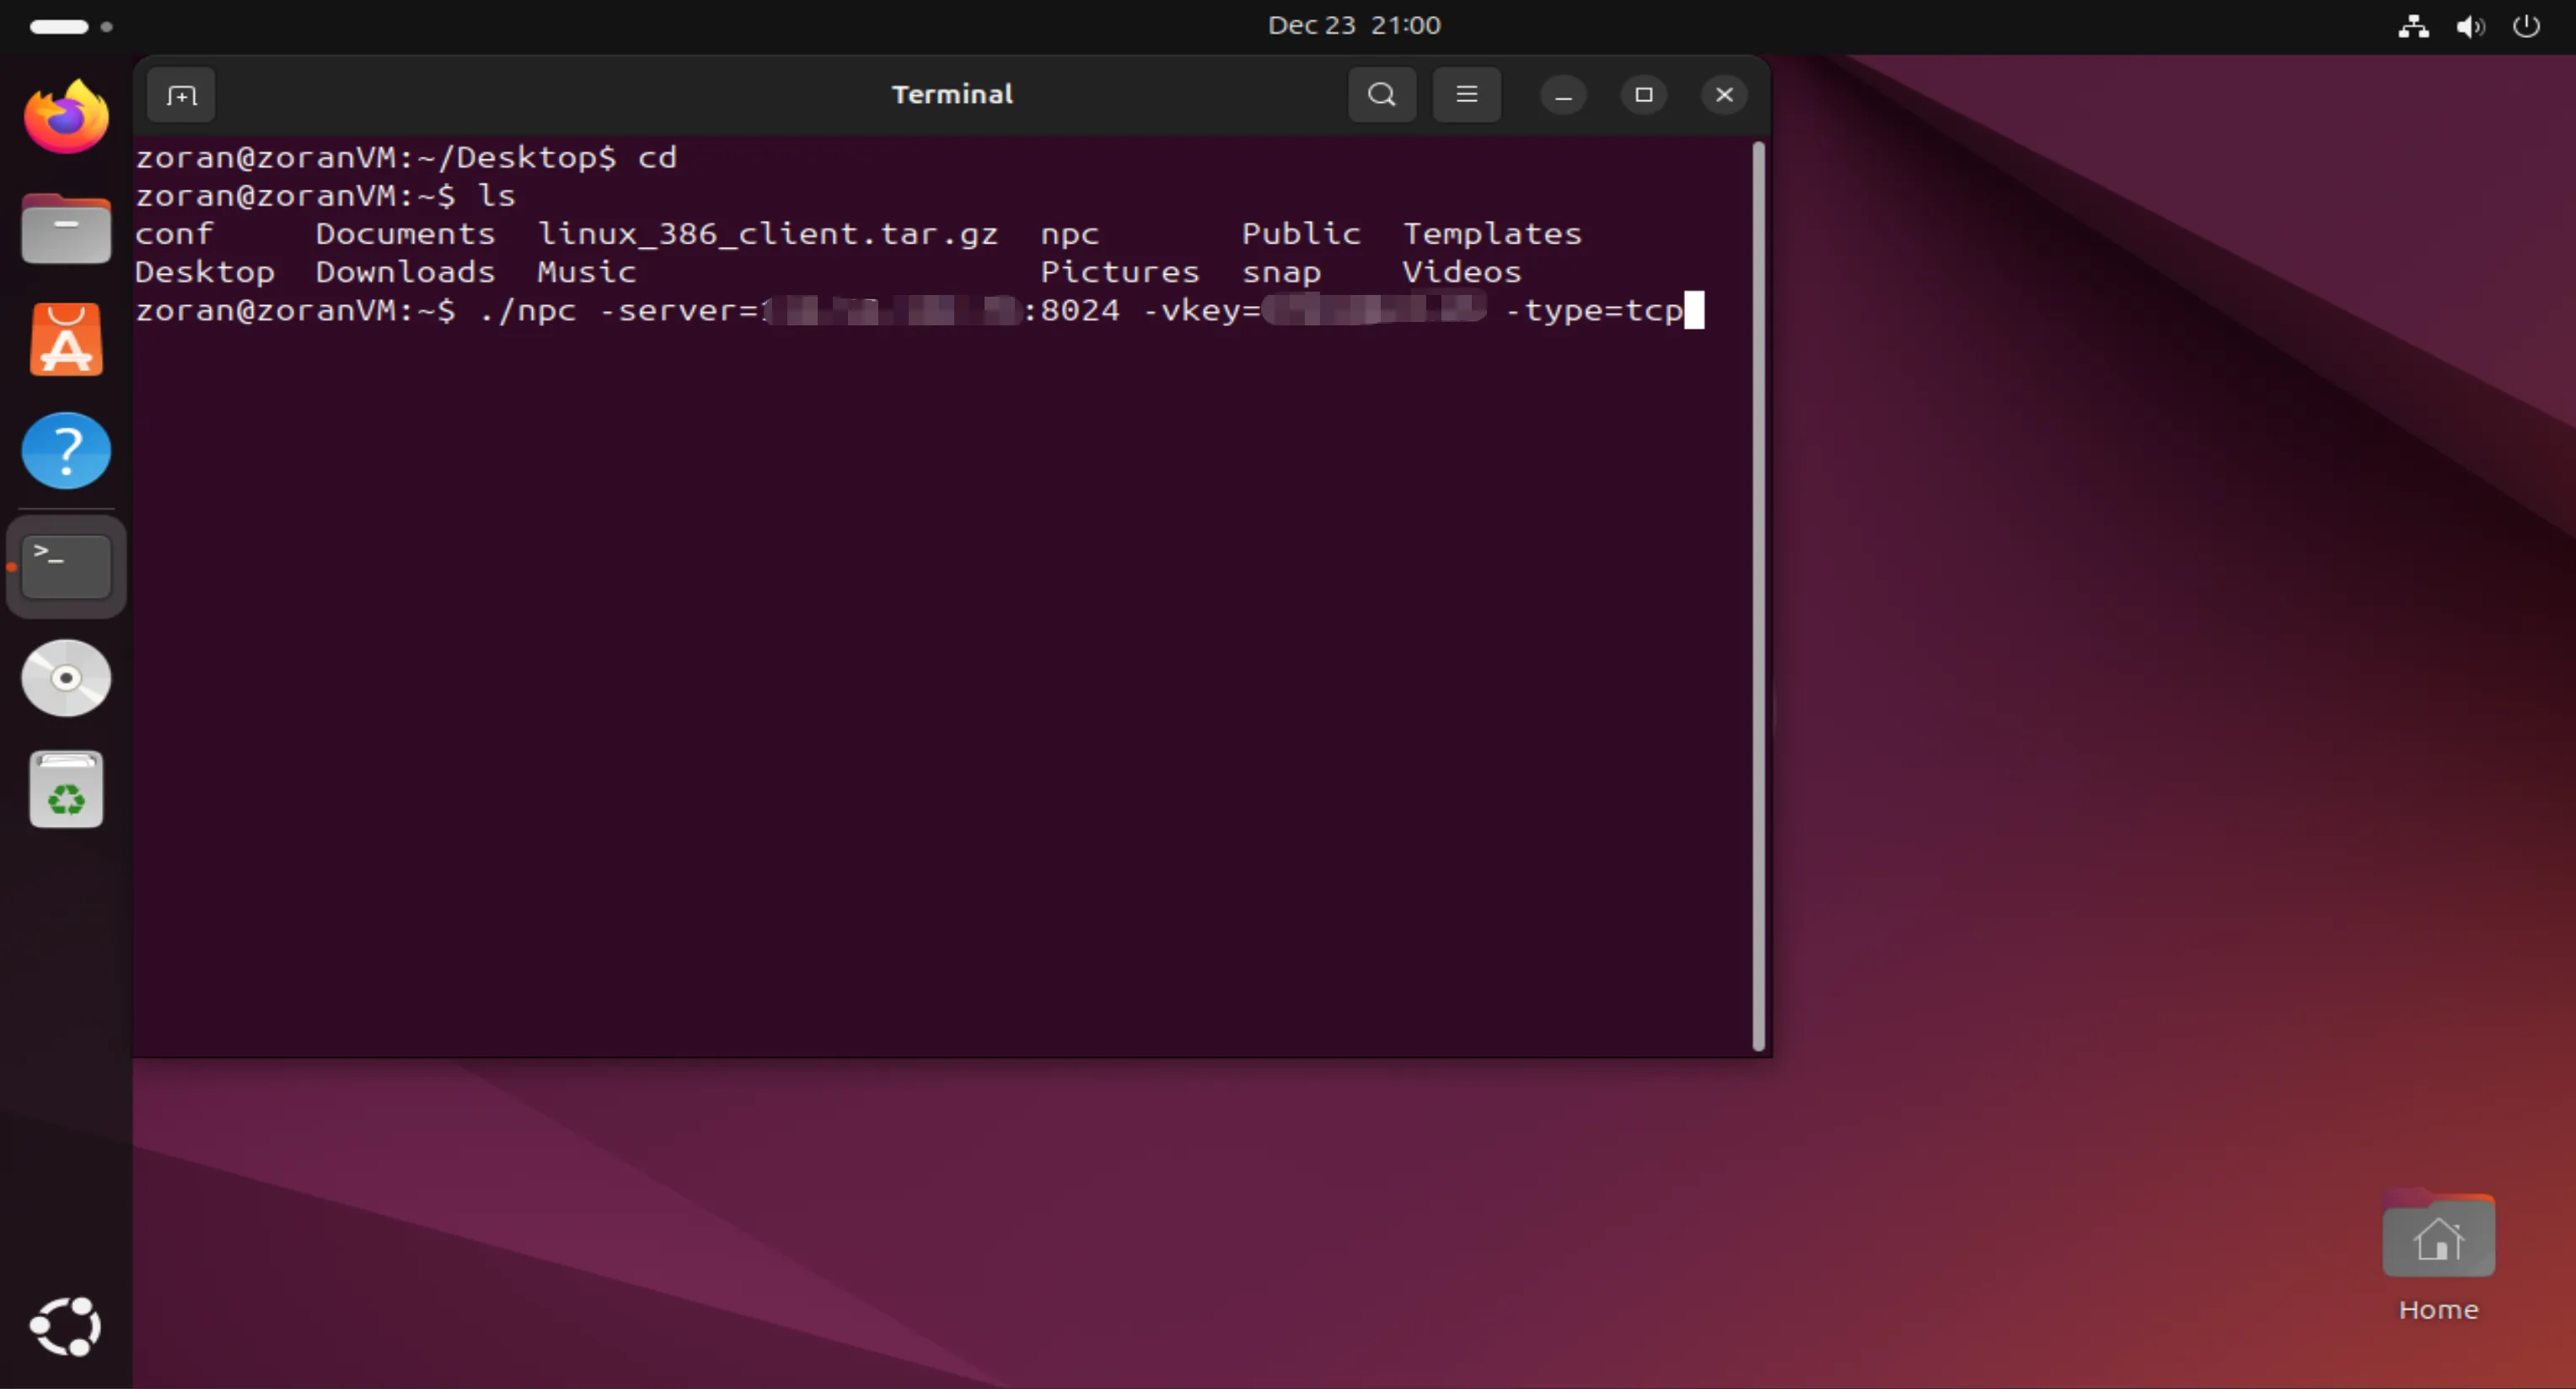
./npc -server={server IP/domain}:8024 -vkey={secret key} -type=tcp
Run in Ubuntu Terminal, keep the virtual machine running in the background!
Minecraft Server Installation
Access intranet IP:23333, enter the Minecraft server control panel. Create a new instance:
Startup command:
java -jar xxx.jar   // Fill in according to the server file name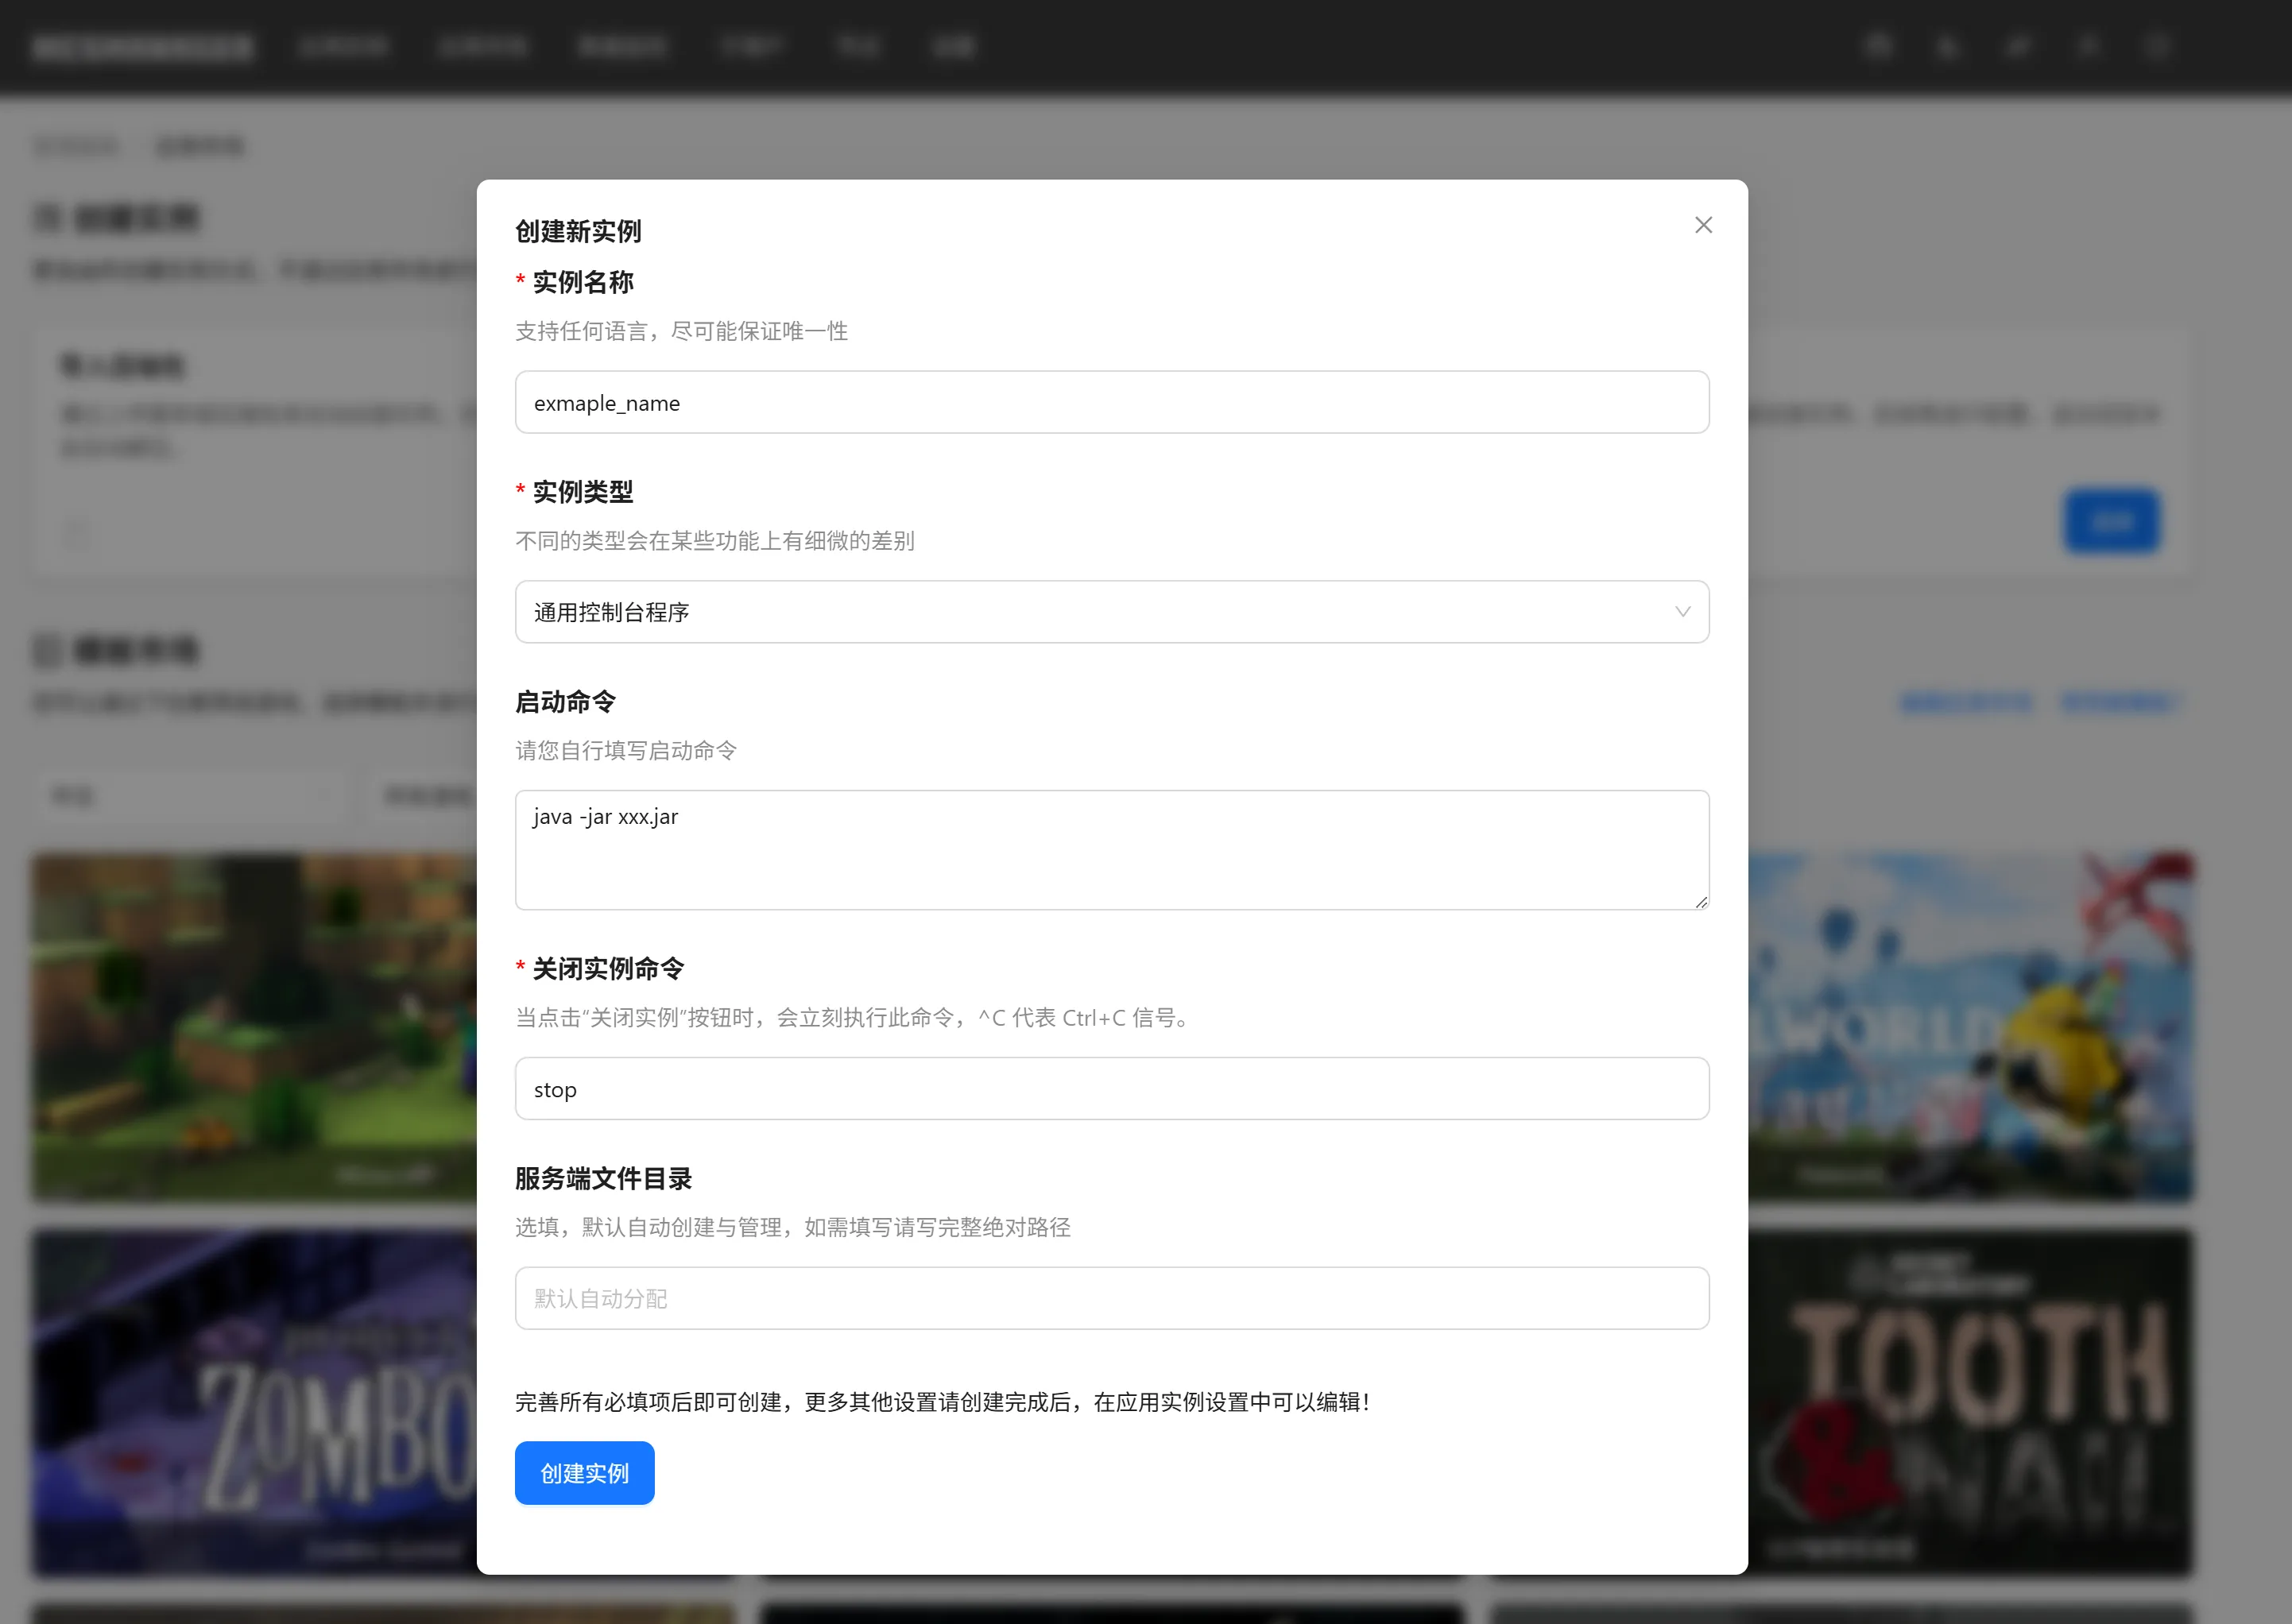
Upload server files:
Here using Paper Server 1.20.4 as an example:
Download URL:
https://fill-data.papermc.io/v1/objects/cabed3ae77cf55deba7c7d8722bc9cfd5e991201c211665f9265616d9fe5c77b/paper-1.20.4-499.jarUpload to the server file root directory and start the service:
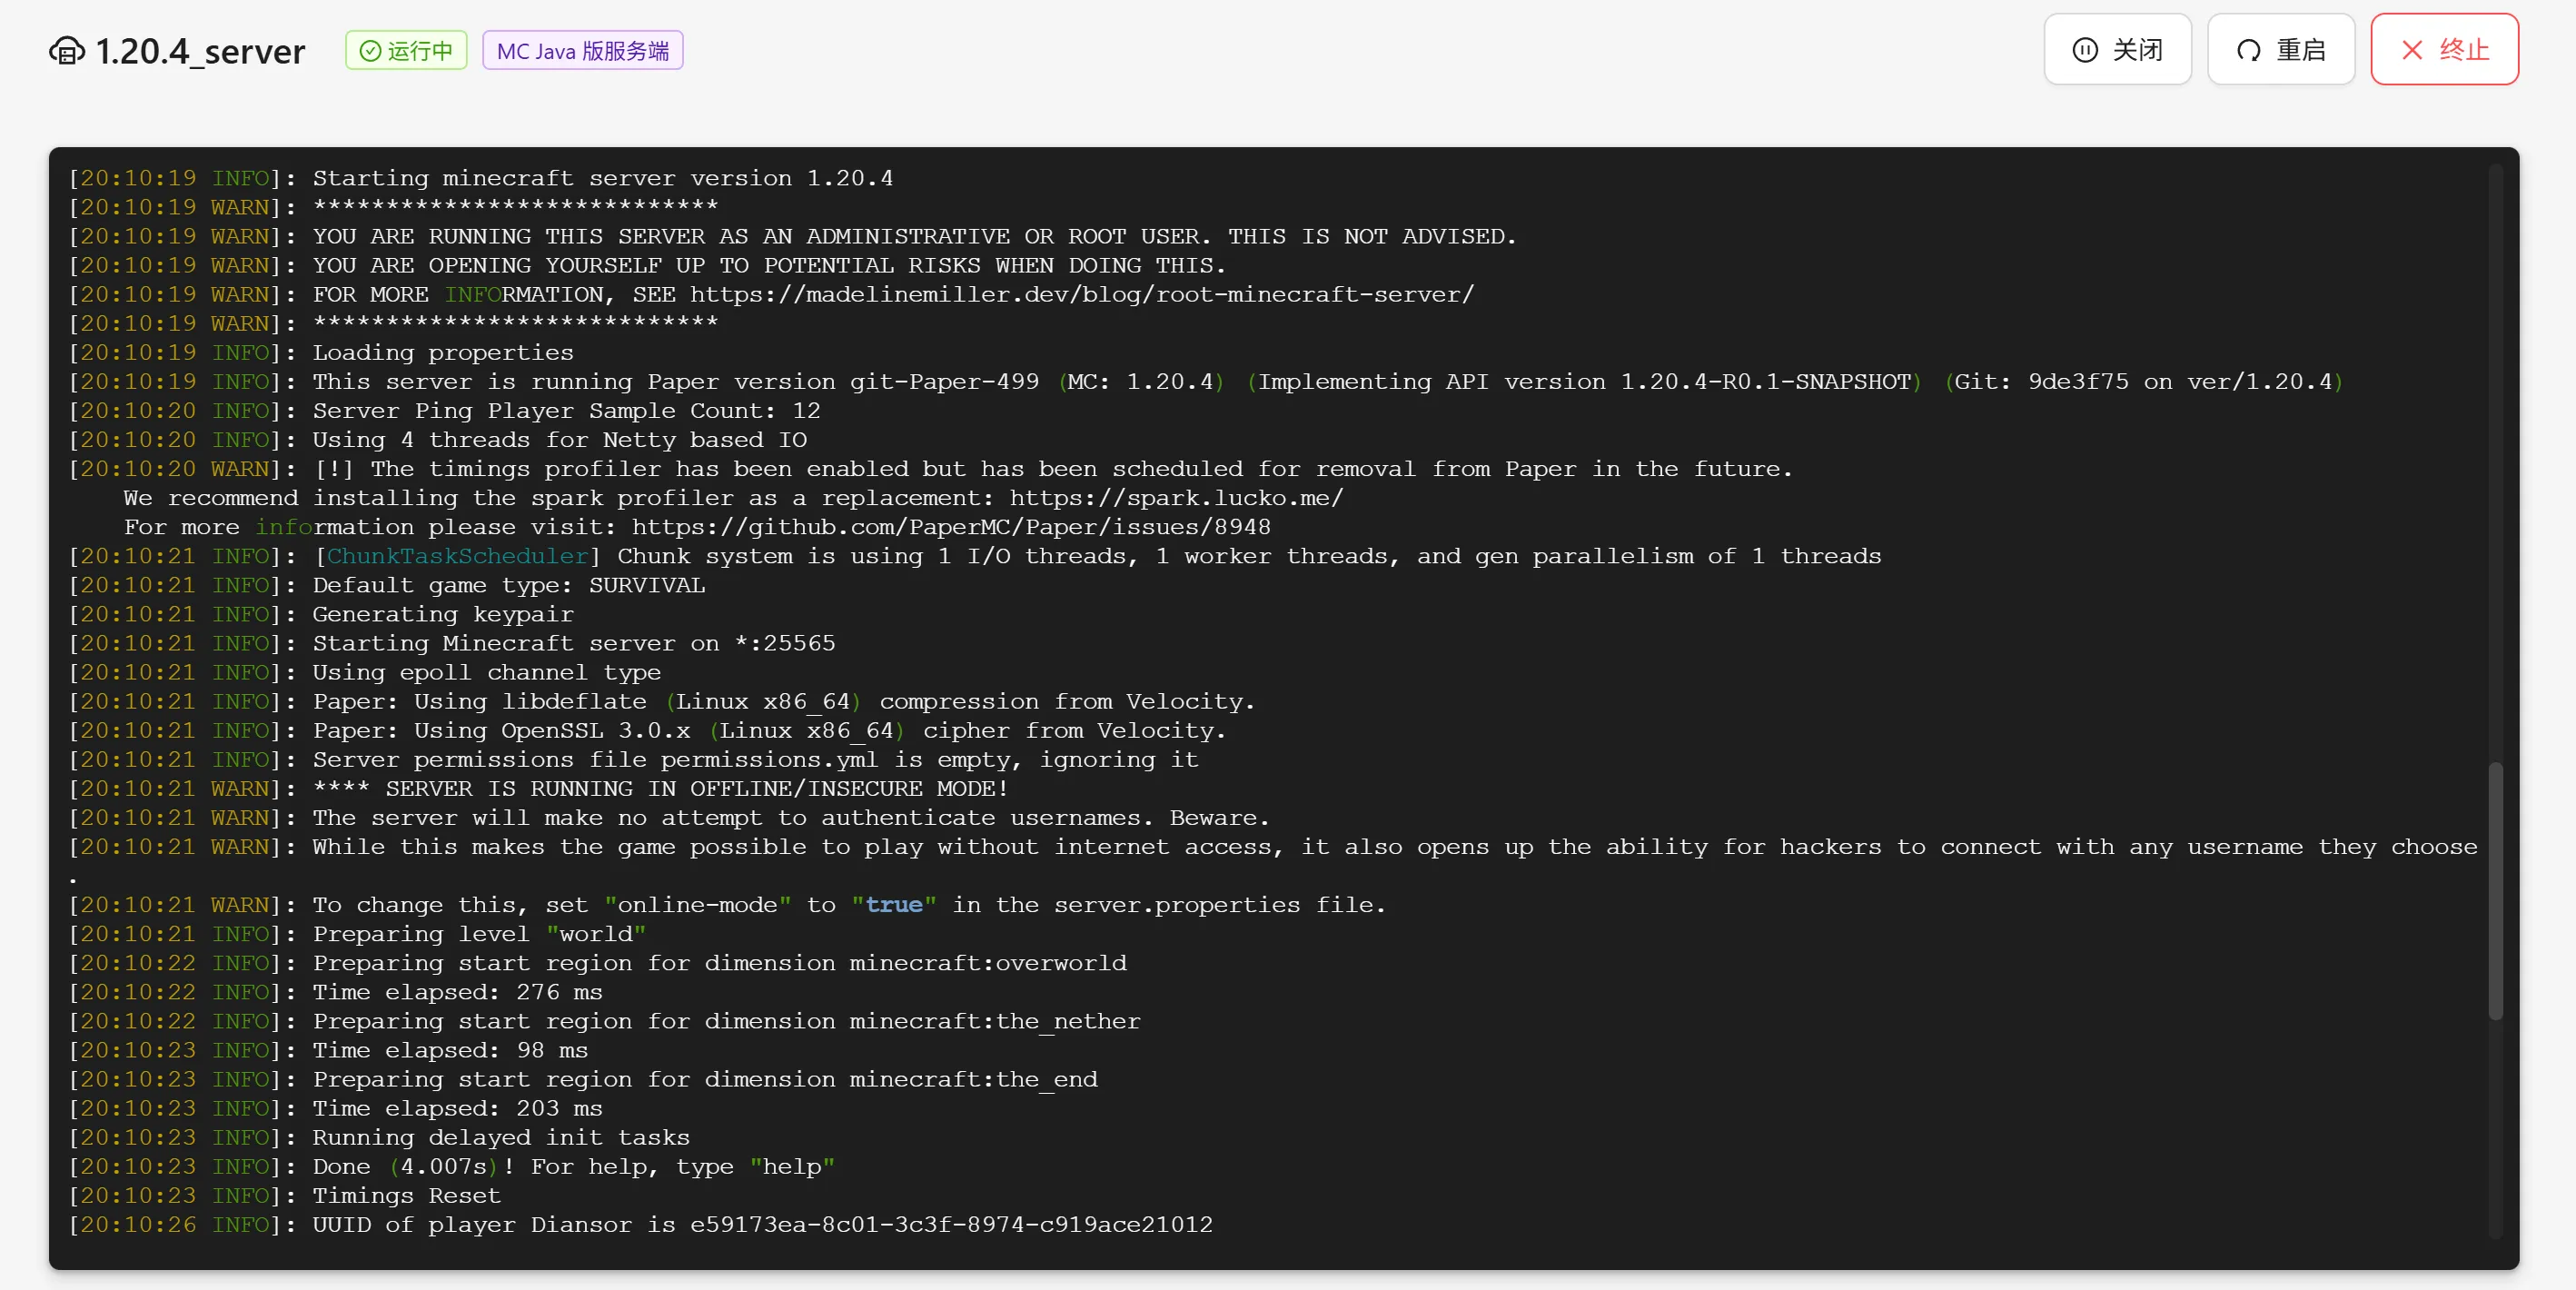
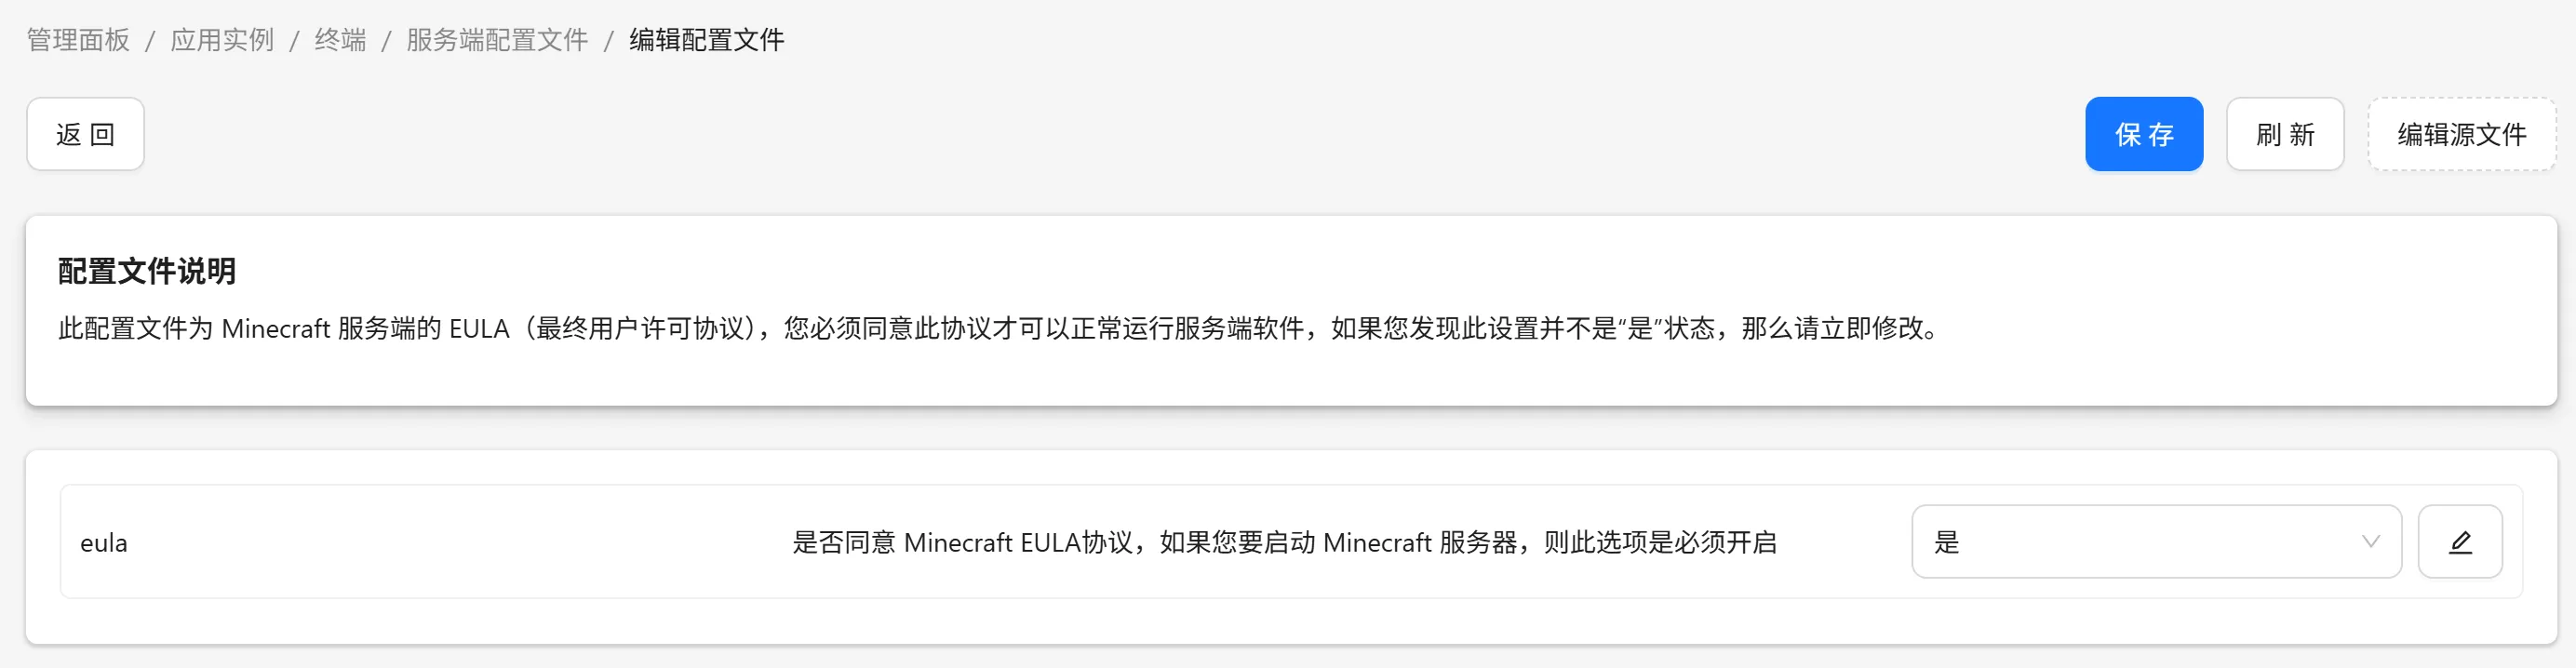
Accept the EULA as required:
Just enable it in the server configuration file!
Summary
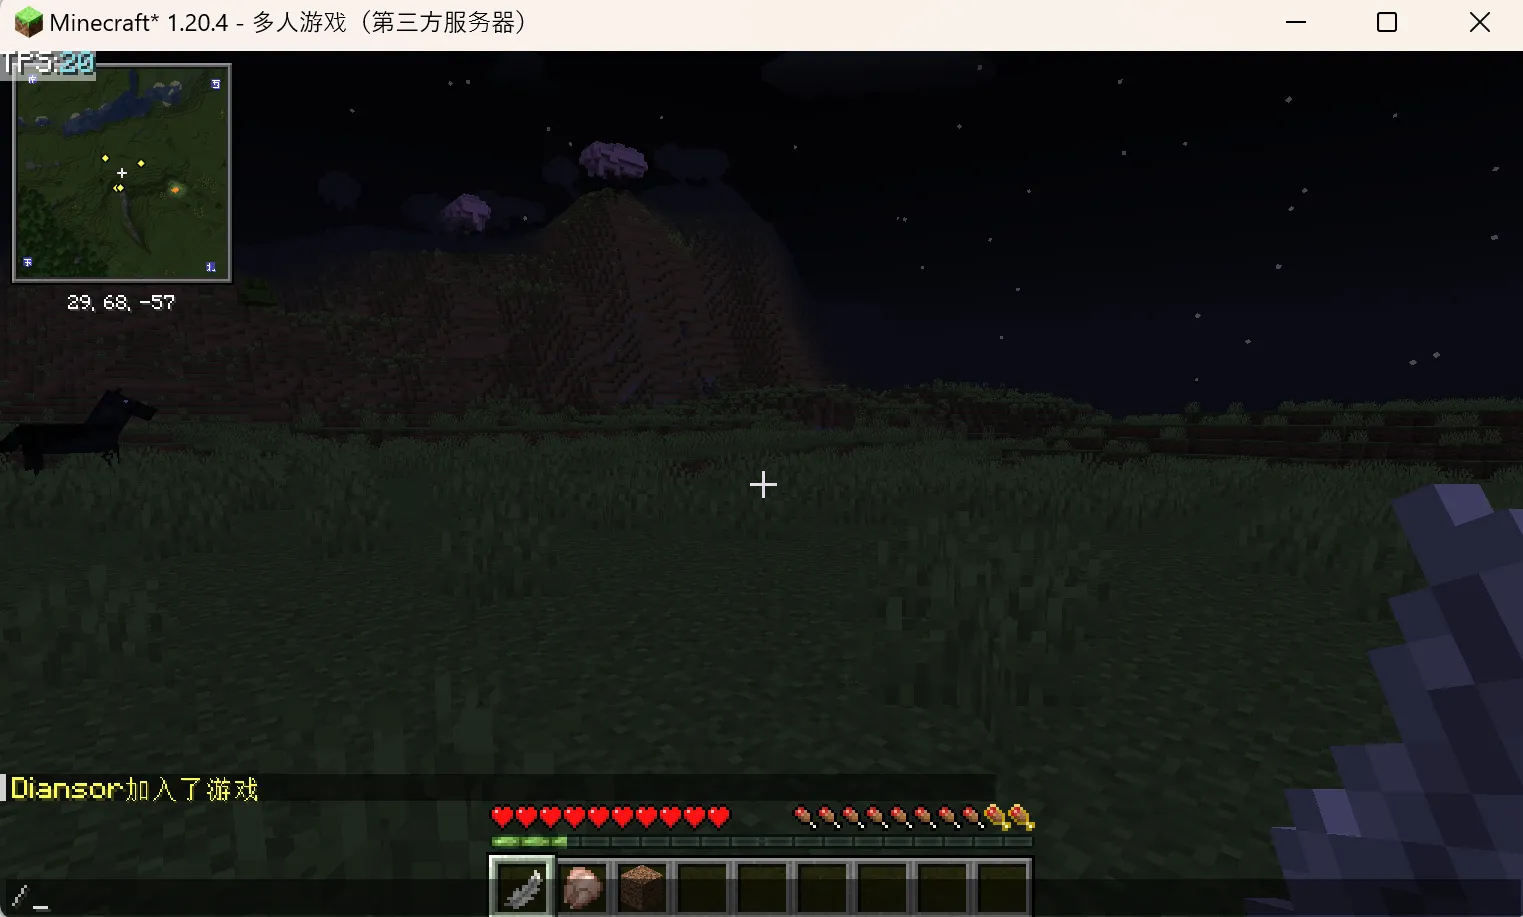
Finally, you can connect via the Minecraft multiplayer server!
Although the overall process is relatively complex, it maximizes the solution to insufficient server configuration — you only need to adjust public bandwidth as needed. A typical 1M public bandwidth can support 2-3 players on a vanilla server.
Reference Links
The following links are the original download URLs needed:
https://github.com/ehang-io/nps
https://docs.mcsmanager.com/zh_cn/
https://papermc.io/downloads/paper